Fire Mission FFE, Over!

Welcome to my blog!

It will be a blog where I review tactical and military gear. These reviews will be truthful and unfunded. The reason behind these reviews is that, beside myself, a lot of military members, armed civilians and airsofters are looking for quality gear. To help them in this “neverending journey”, I will explain why some products work or don’t work for me.

I hope you’ll find what you’re looking for.

FMB

Show of Force

Equipment: 2021

Current setup and the philosophy behind it.

Looking back at an old post I made, I realised I need to do an update in the gear I use.

I will do this in a 3 part series, showing my first, second and third line.

A bit different than last time, I will now explain why I run certain things the way I do.

Reason for that is the many questions I get about my setup via DM on IG.

If you want to learn more about some setups and the reason “why”: check out @ blakewater0326 on Instagram. He has an amazing series called kit-siderations, talking about plate carrier, chest rig, belt, pack, helmet and weapons setups.

This series will be my overview and the “why” behind my setup.

Please not that this will be specific to my role. JTAC supporting a conventional and mostly motorized unit.

Line 1: clothing and belt: survival and E&E.

Line 2: plate carrier and backpanel: execute the mission

Line 3: pack and vehicle: sustainability equipment

BLACKFOLIUM MARS Sling: part 2

Guest writer: Matt

C360_2017-11-03-20-17-21-061

Some people are not to be mentioned on social media. The kind of quiet professionals that work under the radar, blend in a society that is not really theirs. They don’t always have the opportunity to take pictures since that would compromise their cover. They do test their gear hard but in a different way. They work in civilian clothes in an covert manner. Look like any other civilian until it’s go-time.

Matt is one of them. He received some gear from Blackfolium to test during his deployments.

The following are his words.

The MARS sling

I must admit that I was a bit sceptic at first when I received the MARS sling from Blackfolium.


G17 sani

For the people that don’t know them yet, Blackfolium is an Italian company that is proud of the quality they put in their products. If you go check out their inventory, its still very limited. To be honest, I don’t think that’s a bad thing. To me that means that, if they come out with a product, its thoroughly tested.

They do provide their gear to quiet and not so quiet professionals, long before it slips over their counter.

IMG-20200423-WA0034

Now back to their rifle sling and why I was sceptical. MARS stands for Multi Adaptive Rifle Sling. My hair on my neck stands up if i hear something that can do it all.

But hear them out.

Options

20180215_093747866125672.jpg

They designed a sling that can be used for several shooting platforms in different configurations. So that’s what I did.

I used their sling on an M4, a 556 SCAR and since they claimed it could be used on several platforms, I used it on the not so common FN P90.

If you check out their website, you will notice that Blackfolium sells this sling in 3 basic configurations but I found the easiest is to select the accessories you want it to come with.

mars (1)1507726861..jpg20180215_093837421873336.jpg

Pretty neat that you can choose instead of paying for a full option of which half you will not use. Your options are single, dual or switchable.

You can add smash and clash hooks, QD swivels and “D” rings. I received the switchable with a “D”ring and two clash hooks. Which was perfect because that way I could test all platforms previously mentioned.

Construction20180215_093759228539981.jpg

Let’s go over construction. The company is proud of their materials used, and they should be. In the gear world, more is not always better.

Some brands just overdo it and make their gear bulky, stiff and it weights a ton.

I think Blackfolium found the perfect balance in their product. The padding is not too thin that the strap would cut. What is more important for my line of work is that it’s not too cumbersome and bulky. If I wedge my P90 in between the land cruisers midconsole and my seat, the last thing I want is a bulky sling that is tangled in my feet, obstructing the pedals. Not an issue with that belt.

point blur_may072018_2103181565957096..jpg20180215_093825251838374.jpg20180215_0938301639600588.jpg

Conclusion

If a slim, well fabricated, not over-engineered with unneeded add-ons, belt is what you’re looking for, I would suggest that you open your horizon and give the MARS sling a try.


FMB:

It is interesting to see how adaptabel the MARS sling is. I still use mine on my SCAR.

Sadly we don’t have pictures of the sling on the P90.

I would like to thank Matt forthe review and his insight. He has a complete different view and works in civilian, while I work in full kit.

I hope you guys like this one.

~FMB

*DISCLAIMER: The sling was given to Matt for testing. He is not paid or bound to write a positive review.*

How to upgrade the issued QRV

*Disclaimer: my title was edited. This article is my personal opinion that I share to help the guys on the frontline*

This is one for the beer drinking Belgians! Apologies to my other followers.

Issued kit. Most of the time it is not of great quality and the same piece of kit is distributed to everyone, all with a different task.We aren’t all Danish and get issued equipment made by Tyr Tactical.

This is one of the reasons why a lot of soldiers buy their own plate carriers, pouches, clothing, etc.

For legal, regulation and stubbornness reasons, some kit has to be used. One of those items is body armor. In the Belgian Army, we now get issued the QRV or Quick Release Vest.

Those who follow my IG (@firemissionblog) may have seen me posting my frustrations about this vest.

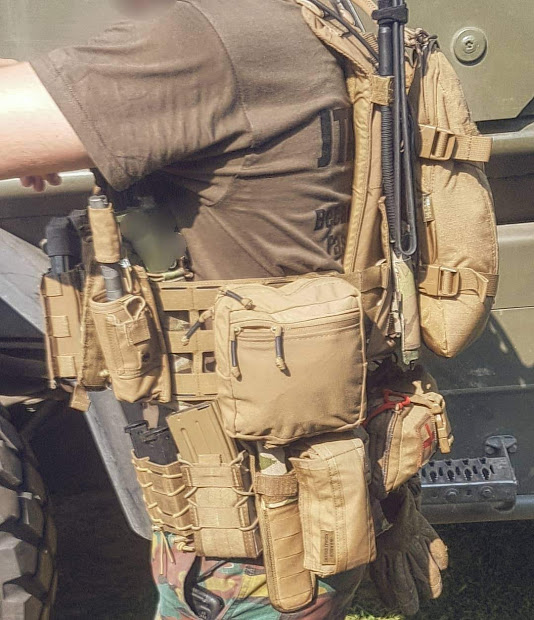
I’m not really known for my standard kit… but to give you guys some options and “lead by example”, let’s attack this beast! I reconfigured my 2nd line to the QRV.

To highlight some of the problems I have with the QRV:

  • Bulky: It’s basically a cheap CIRAS. Using some “modern” techniques, like laser-cut, on a 90’s design.
  • Cummerbund: the cummerbund is designed to hold side plates, which is a good thing. The problem with the cummerbund is that you still have to lift the front flap to put it on. I never like this because your fit is never the same. It also has a weird elastic band that goes over your belly.
  • The front flap: as mentioned I don’t like lifting that flap everytime I’m putting on my vest (Tubes for the win!). Another problem I have with it is that they used the cheapest velcro available. So cheap that when you pull out a magazine from a pouch, the velcro is so weak that you pull the flap loose. But of course they have a solution for this! They just added two snaps on the bottom to keep it closed. Face palm. The front flap is also a weird 8 molle wide, instead of the industry standard 6 molle.
  • Shoulder straps: These are actually ok. They have a lot of padding and have internal cable management loops. They are a bit thick, so not ideal when wearing a pack.

So, how can we solve some of these issues?

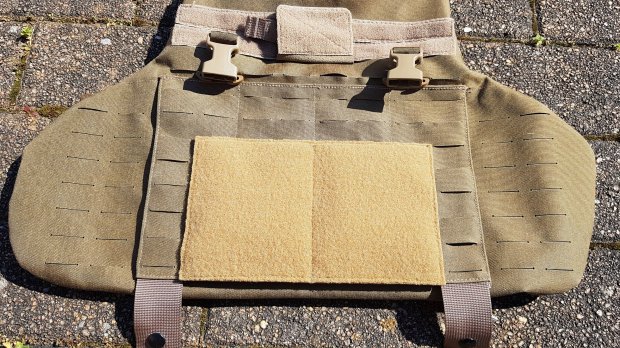
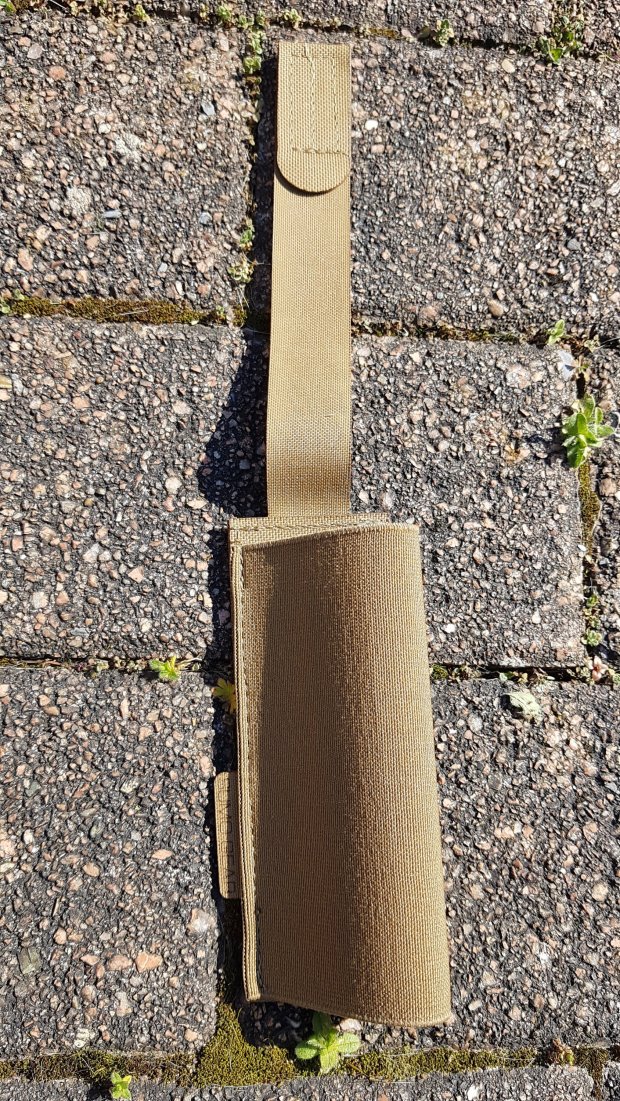
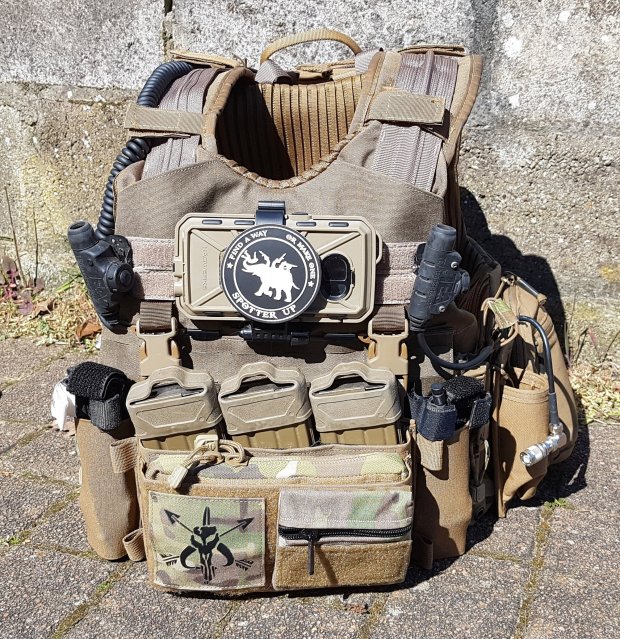
Front flap: Sumo Gear placard adapter & TQ pouches

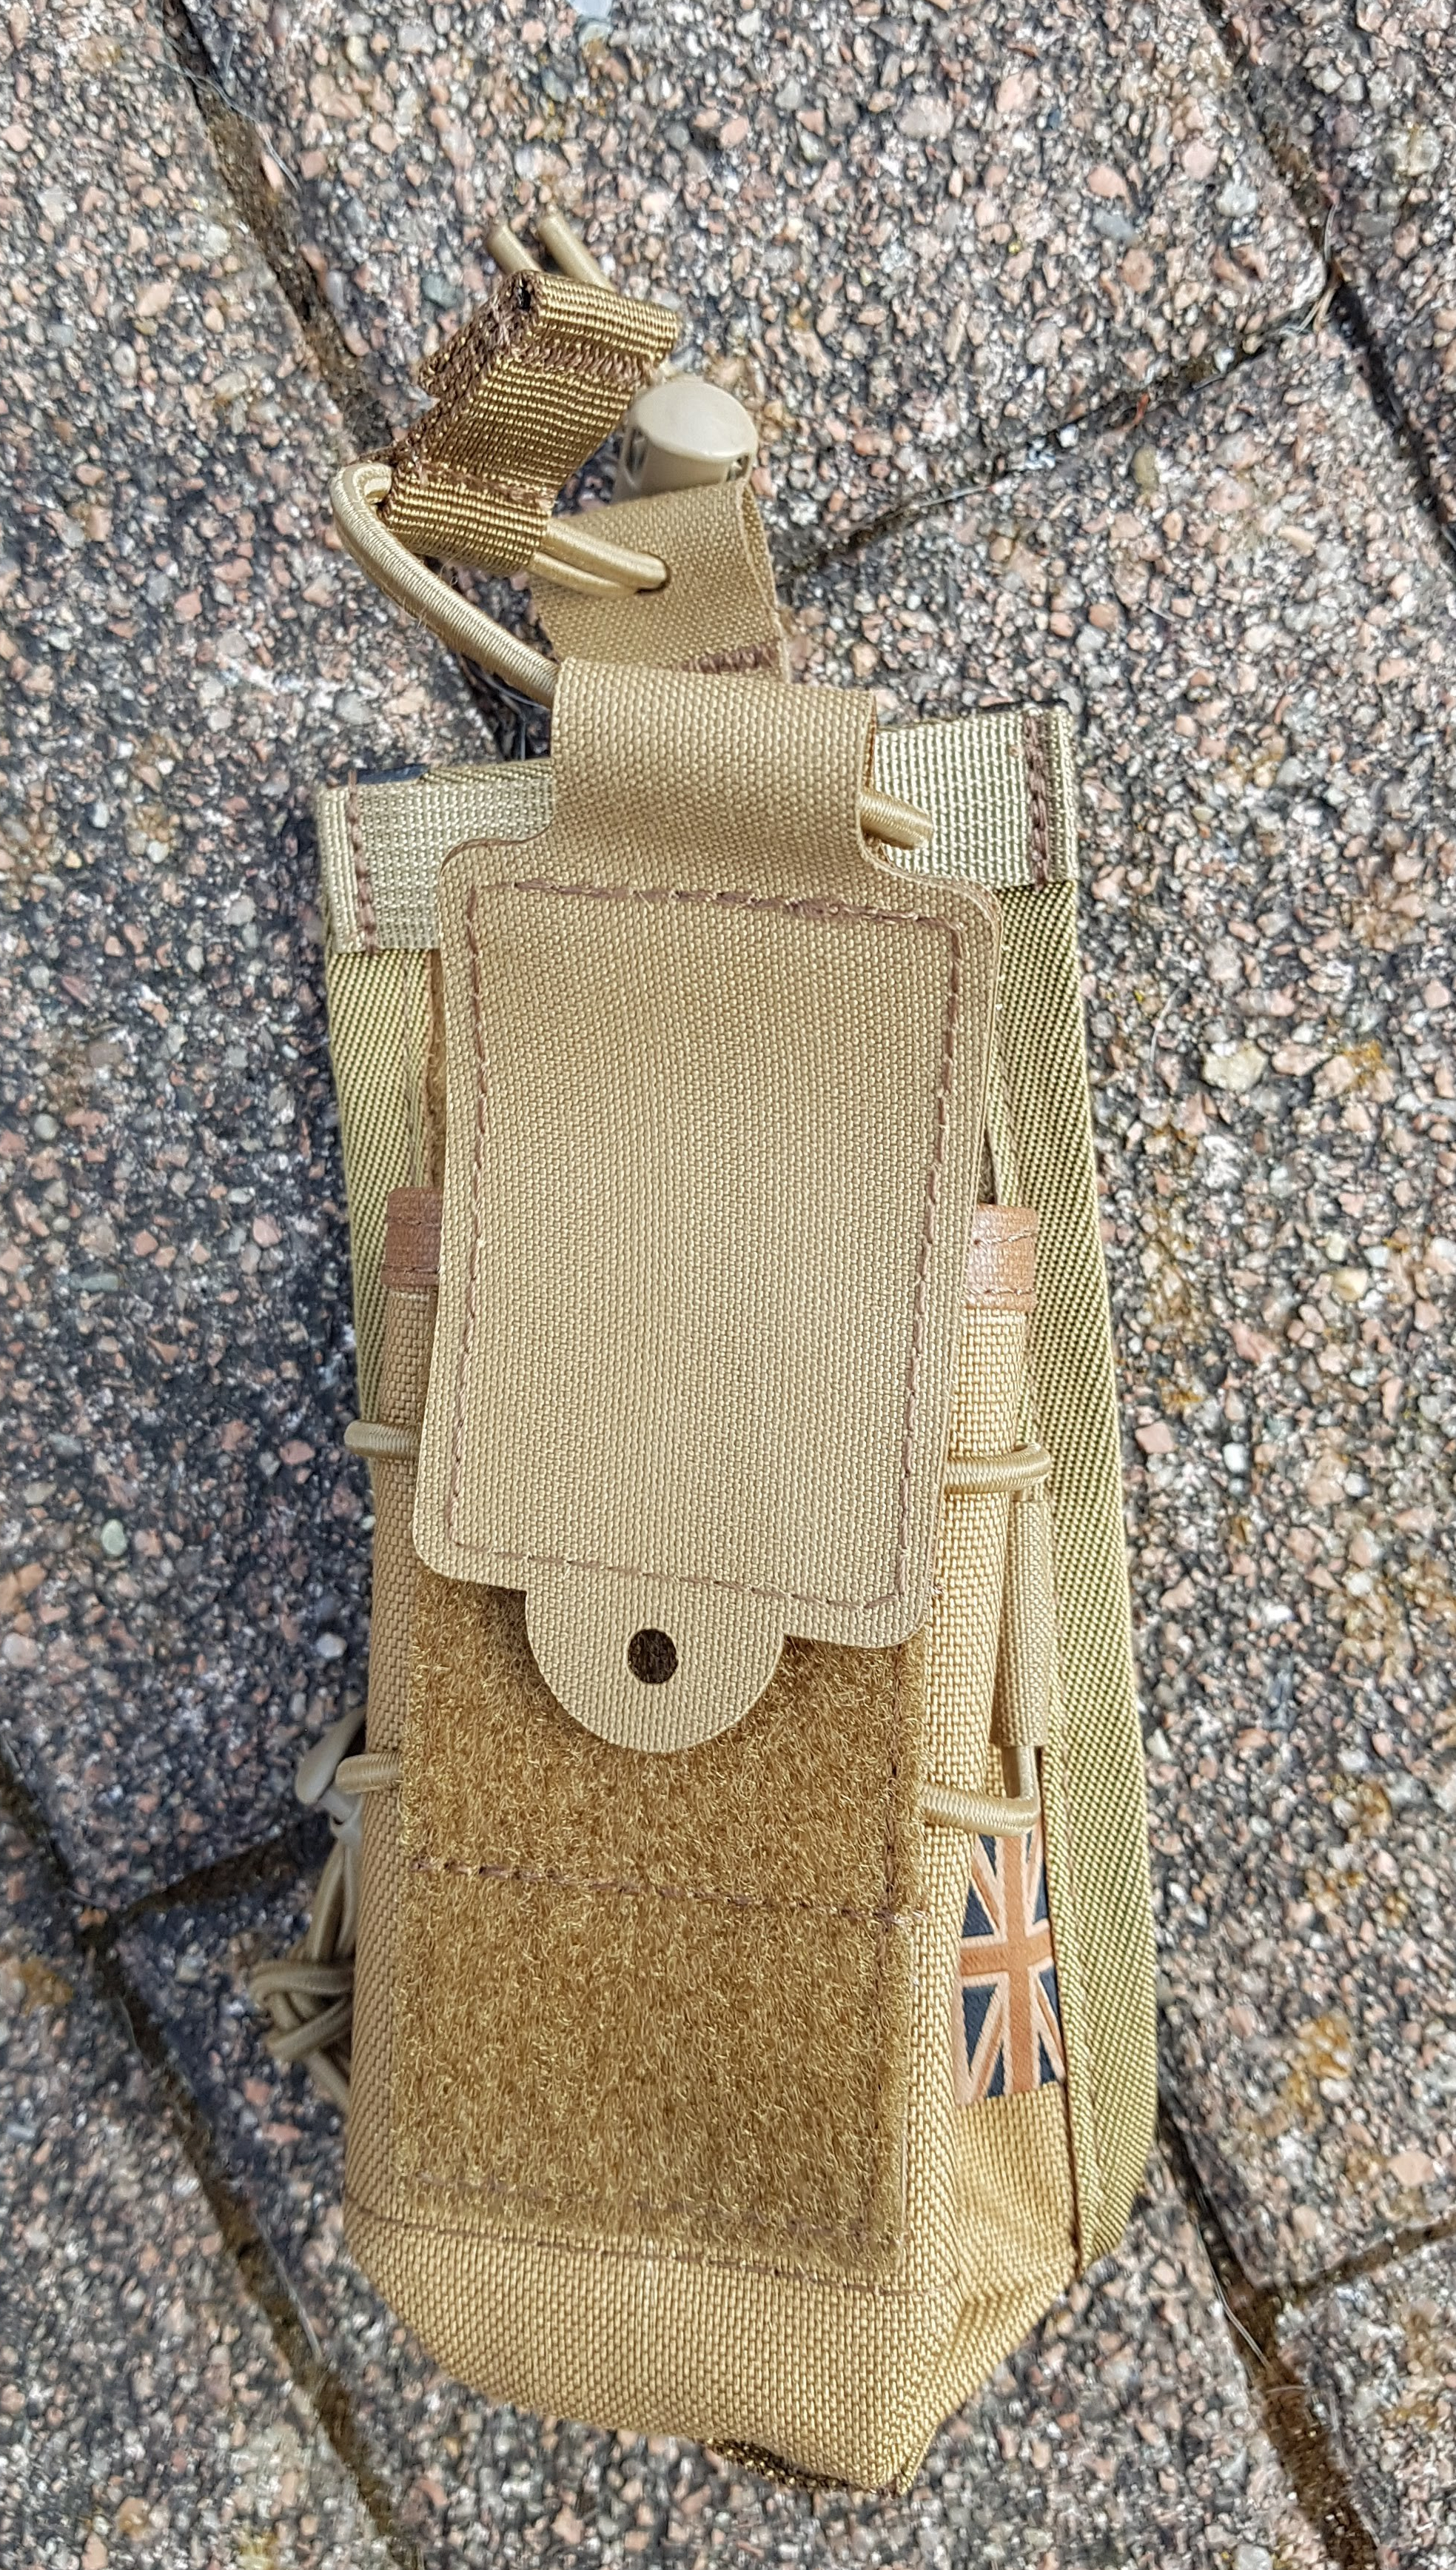
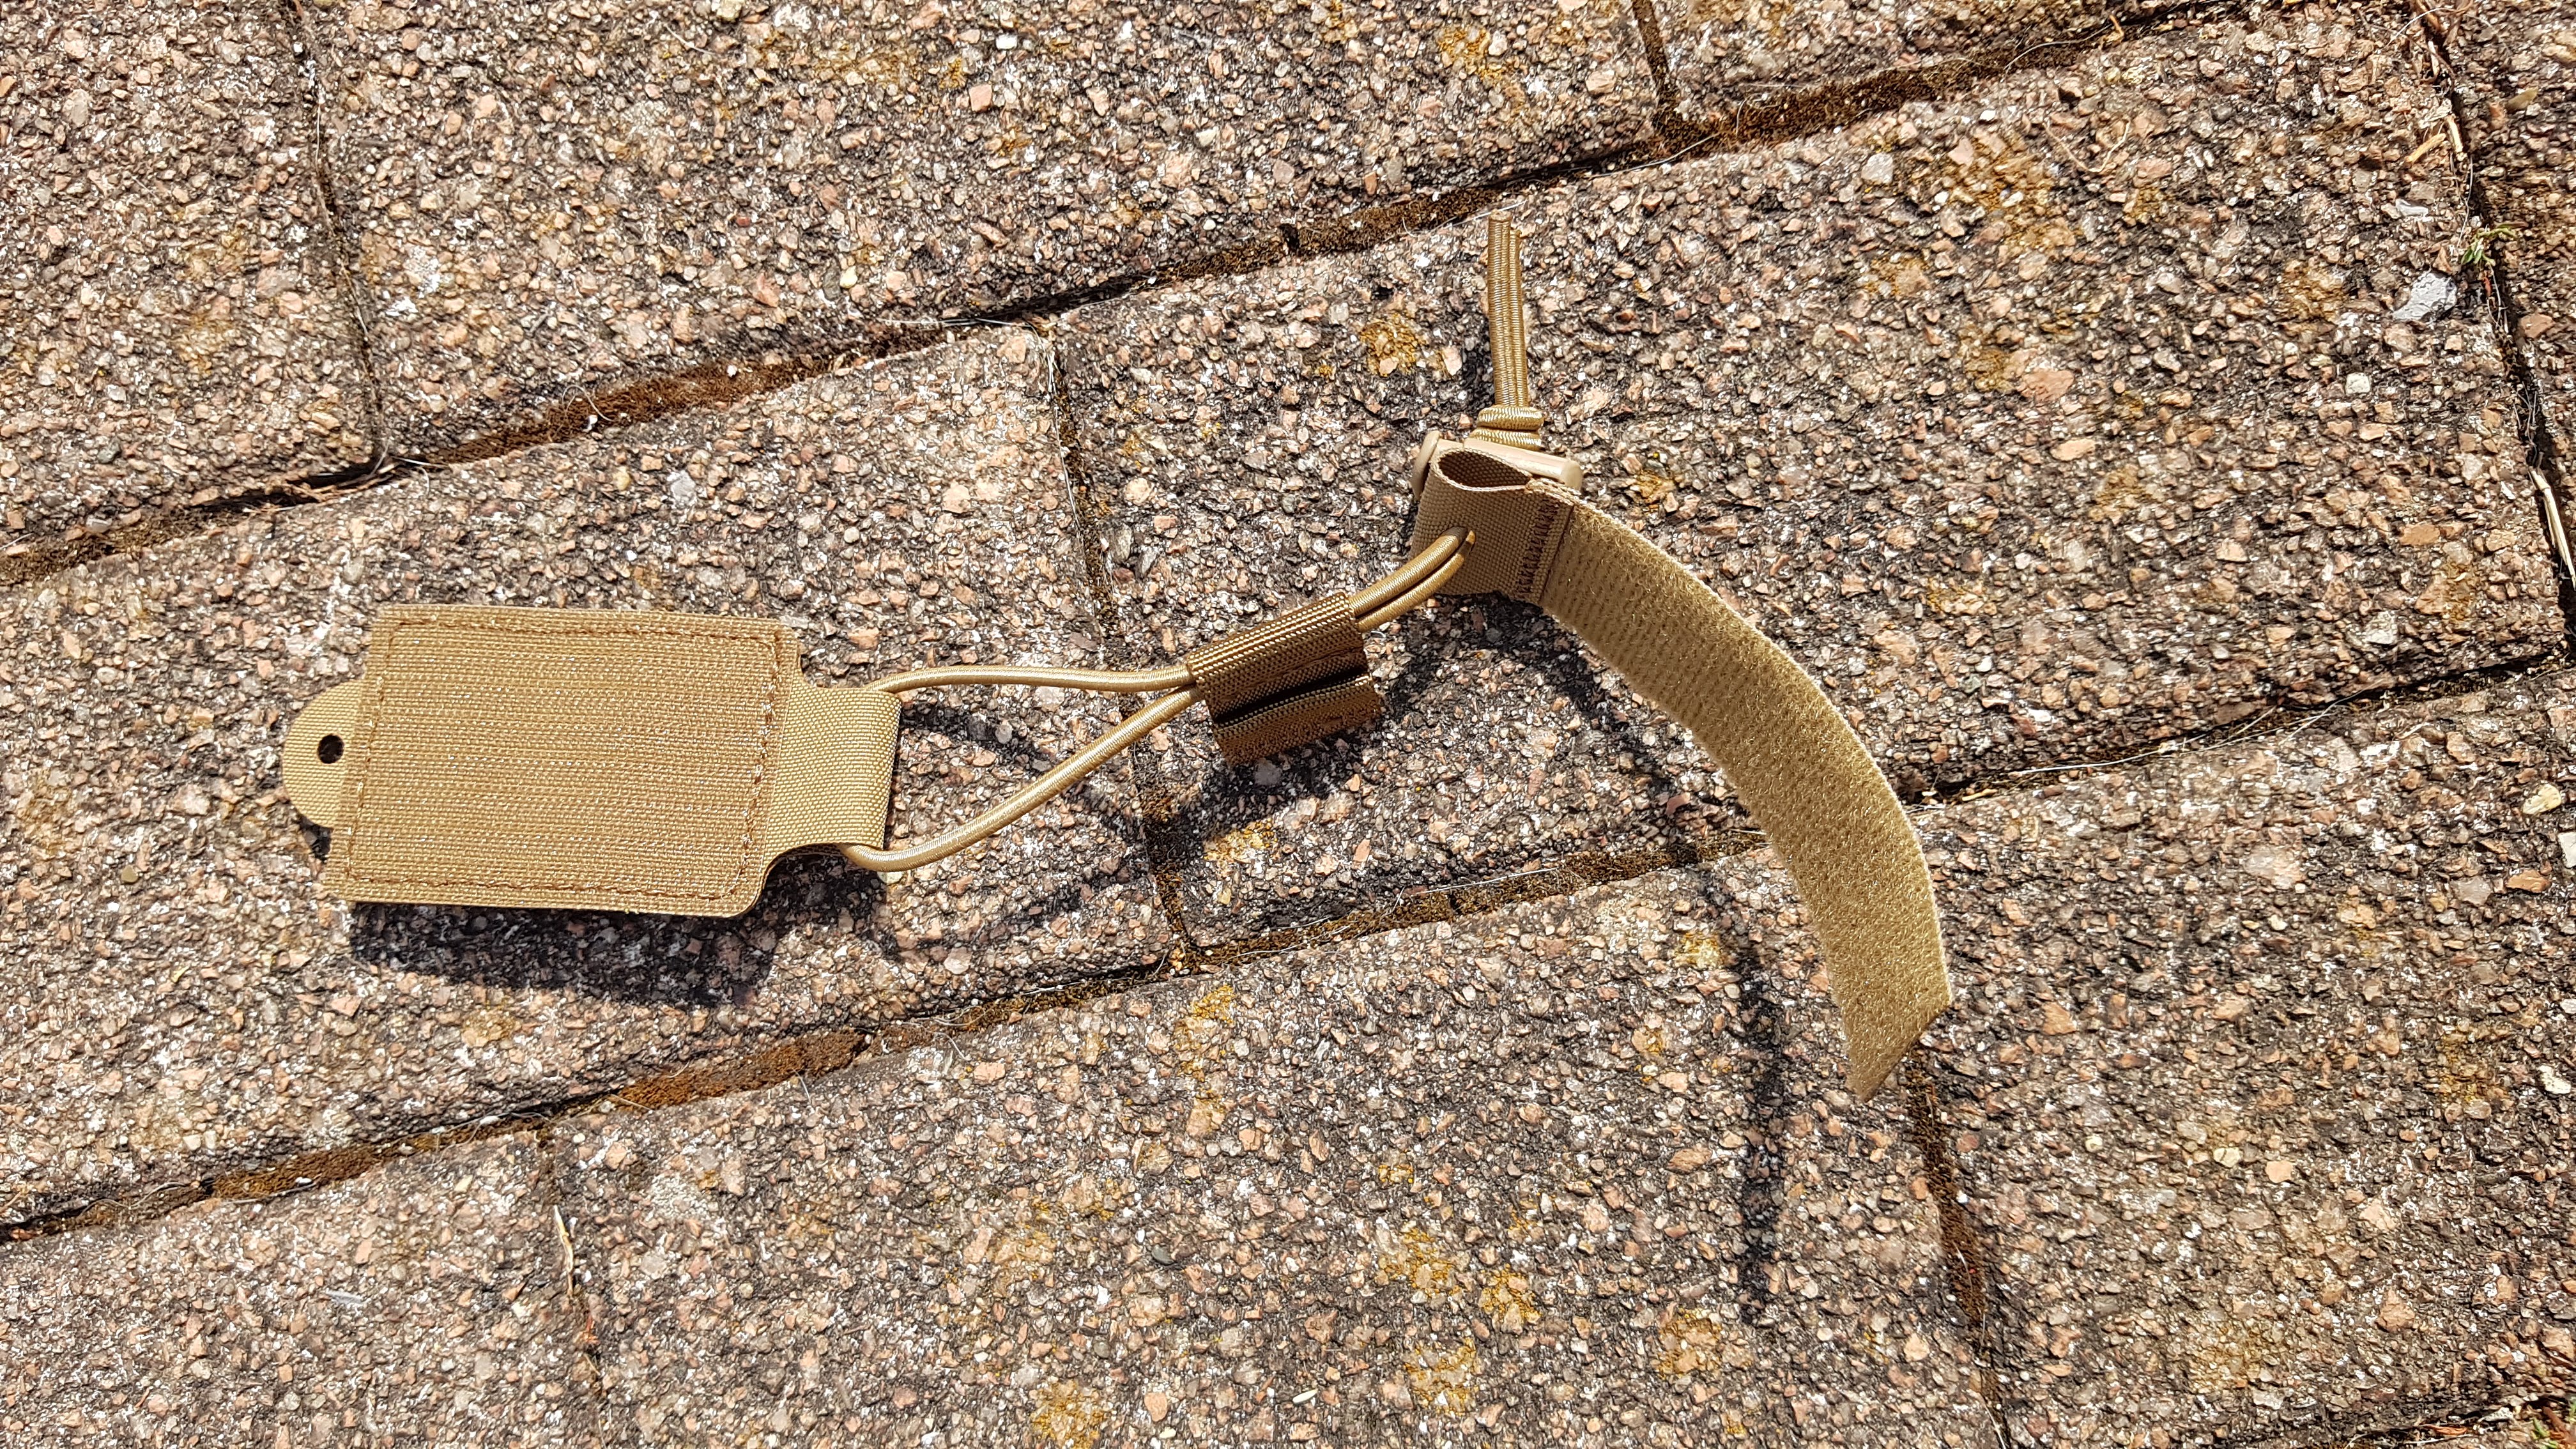
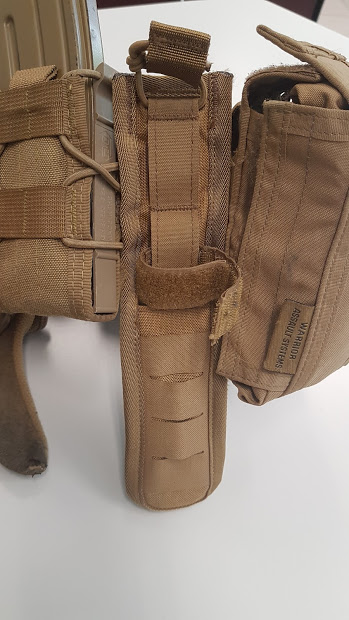
I asked my buddy at Sumo Gear to make me a velcro panel and some TQ pouches. As always he delivered! Top notch quality and the use of laser-cut backing makes the panel lightweight and flat. I know there are several other brands and options that make a similar product. But with the recent situation, let’s buy local.

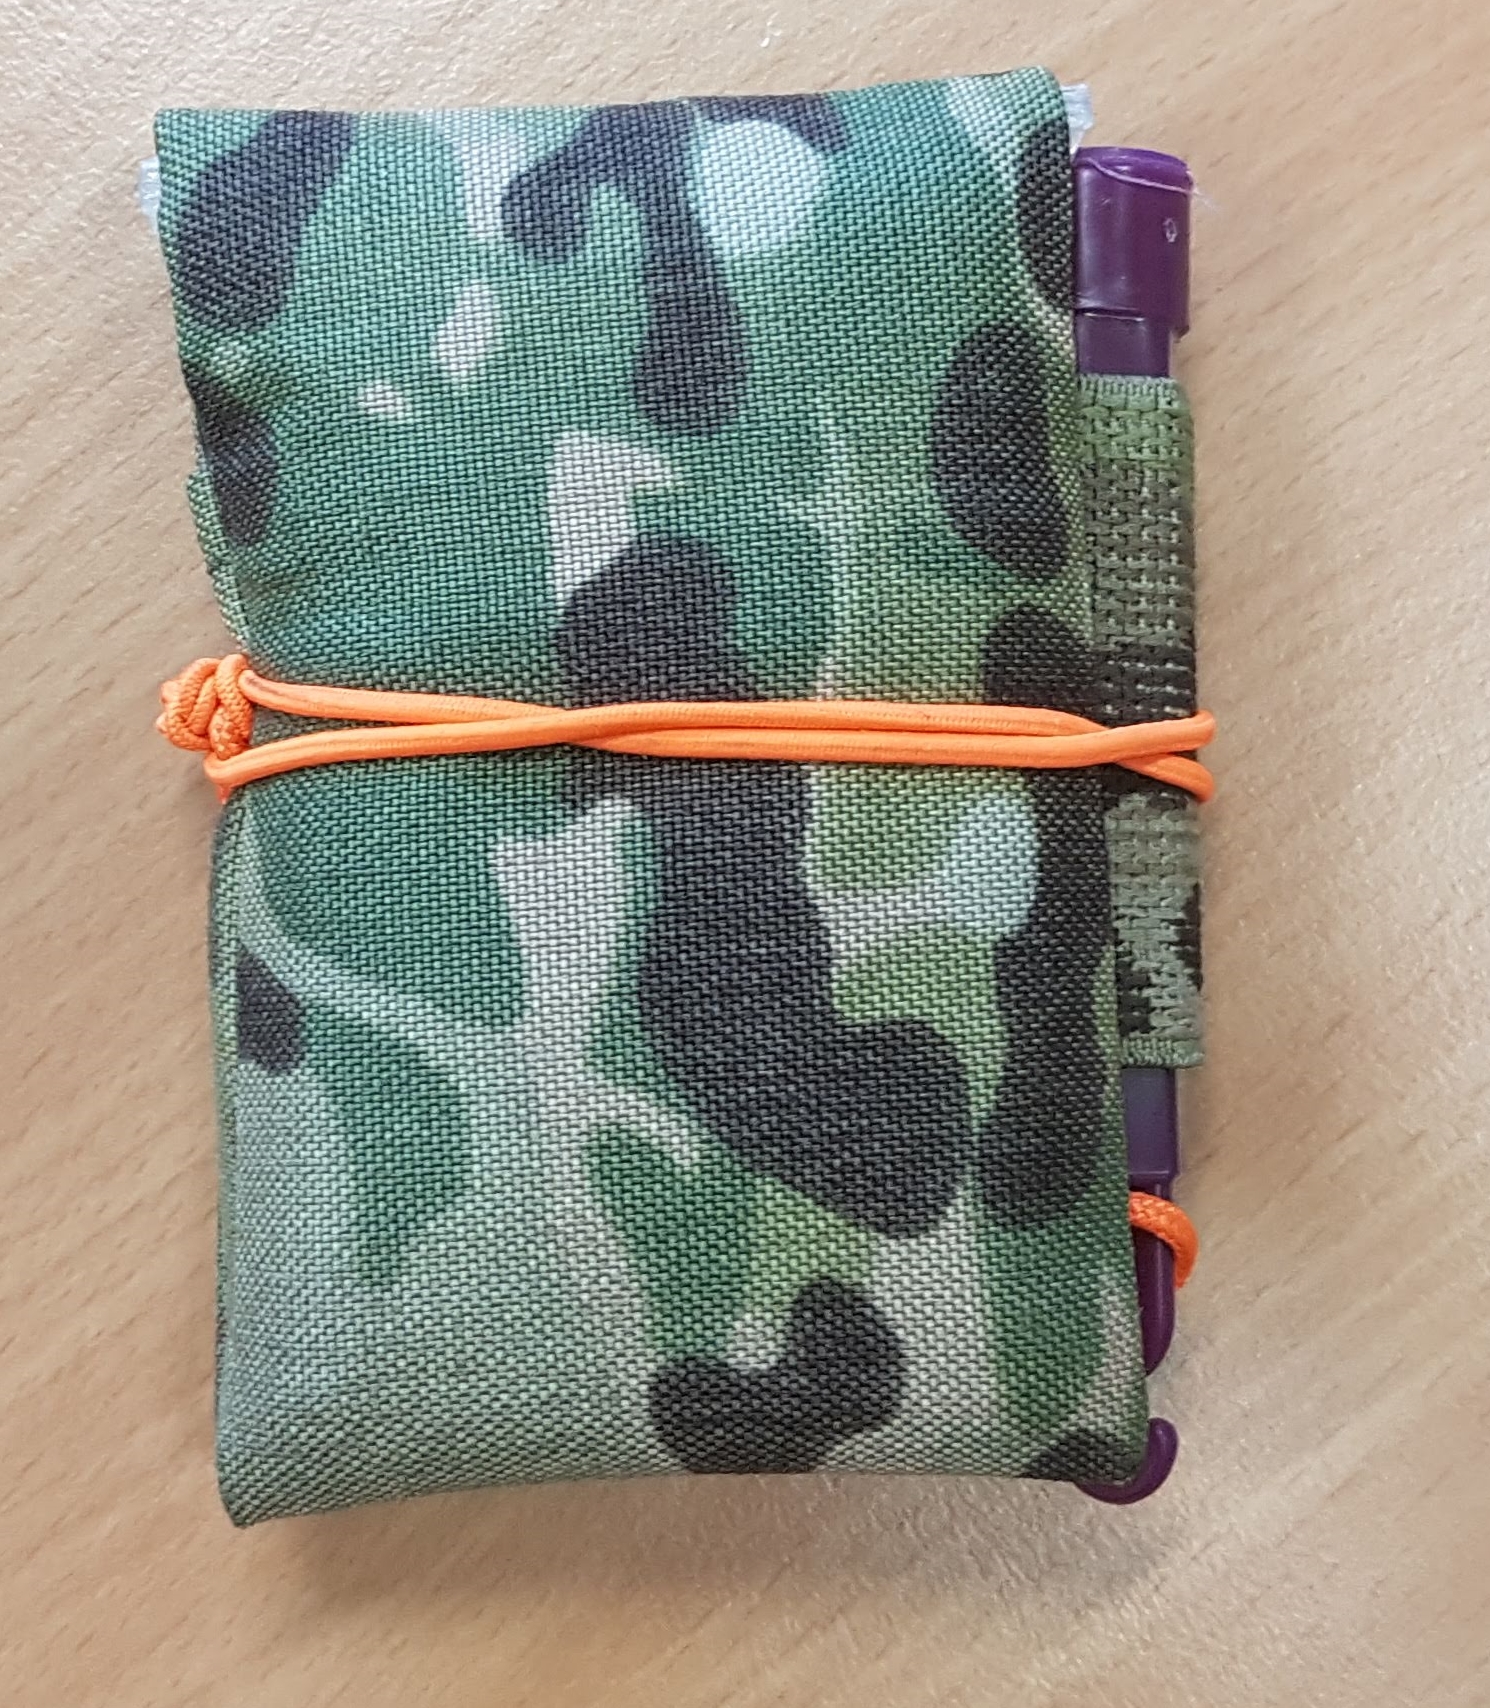
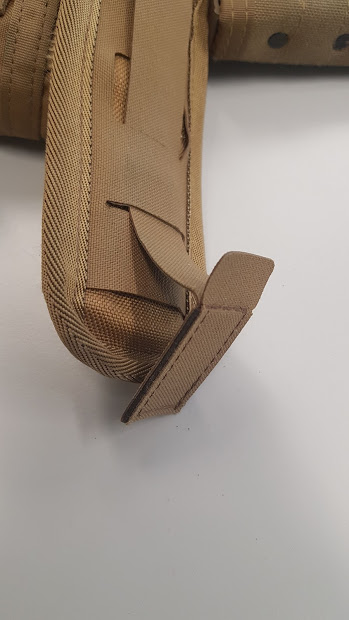
He also made two TQ pouches that fit the CAT TQ (Belgian Defence SOP) perfectly. It’s a well made pouch, also using the laser-cut backing. I’m still a bit on the fence about this pouch as it doesn’t protect or cover the whole TQ. A JTacticalsolutions might come in the future.

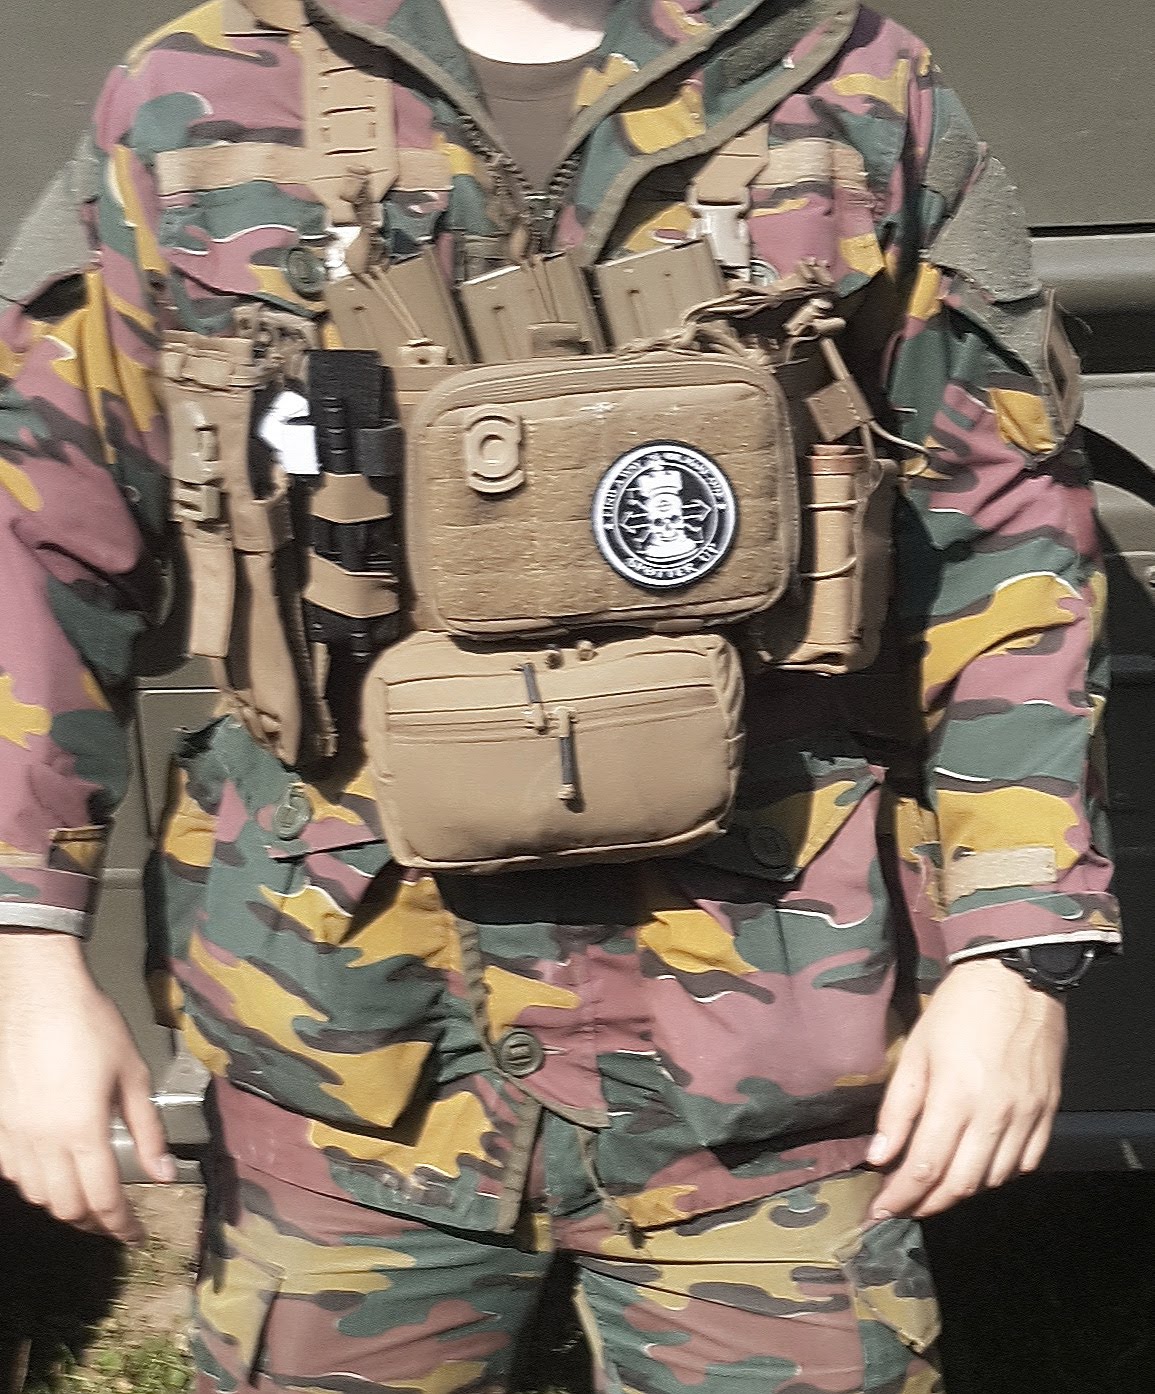
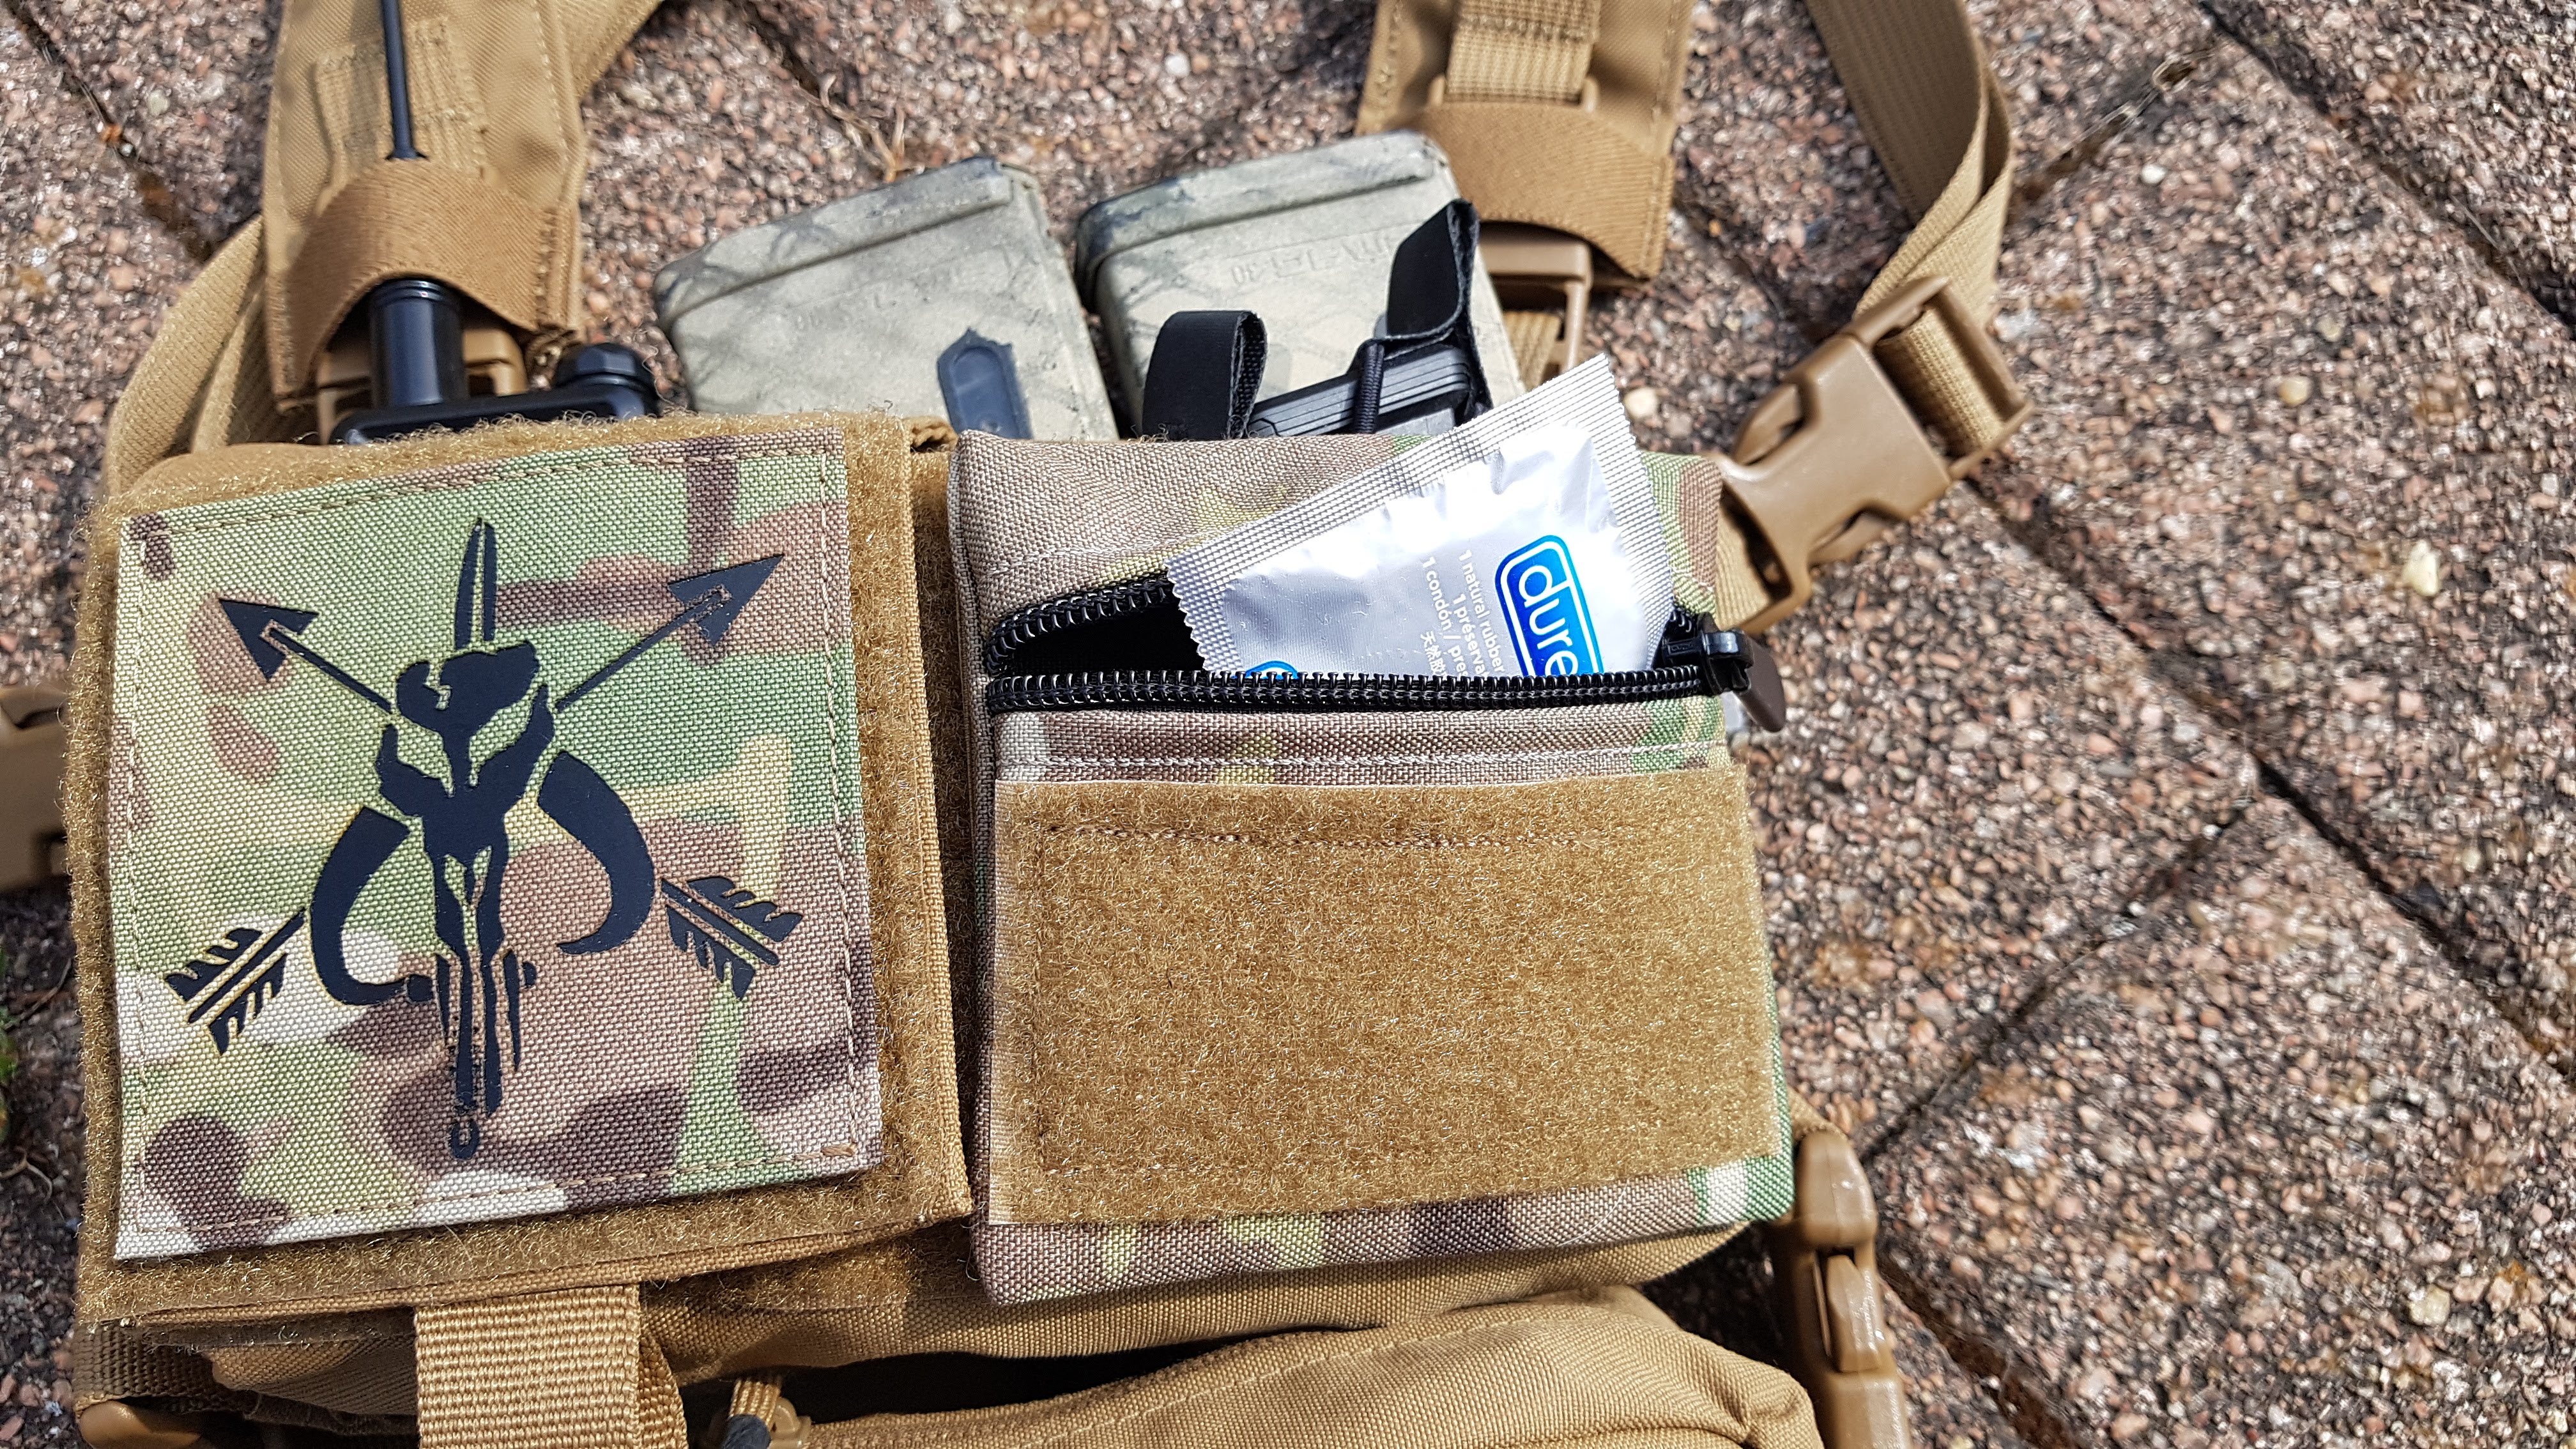
Using the velcro panel, flanked by the TQ pouches, I have completely covered the front flap. As you could see on my LBT 6094, I like this setup. 3 mags up front, with a TQ at each side.

Now, why did I want a big patch of velcro on the front of the vest? To rock a bunch of patches? Of course not! It’s not all for the gram!

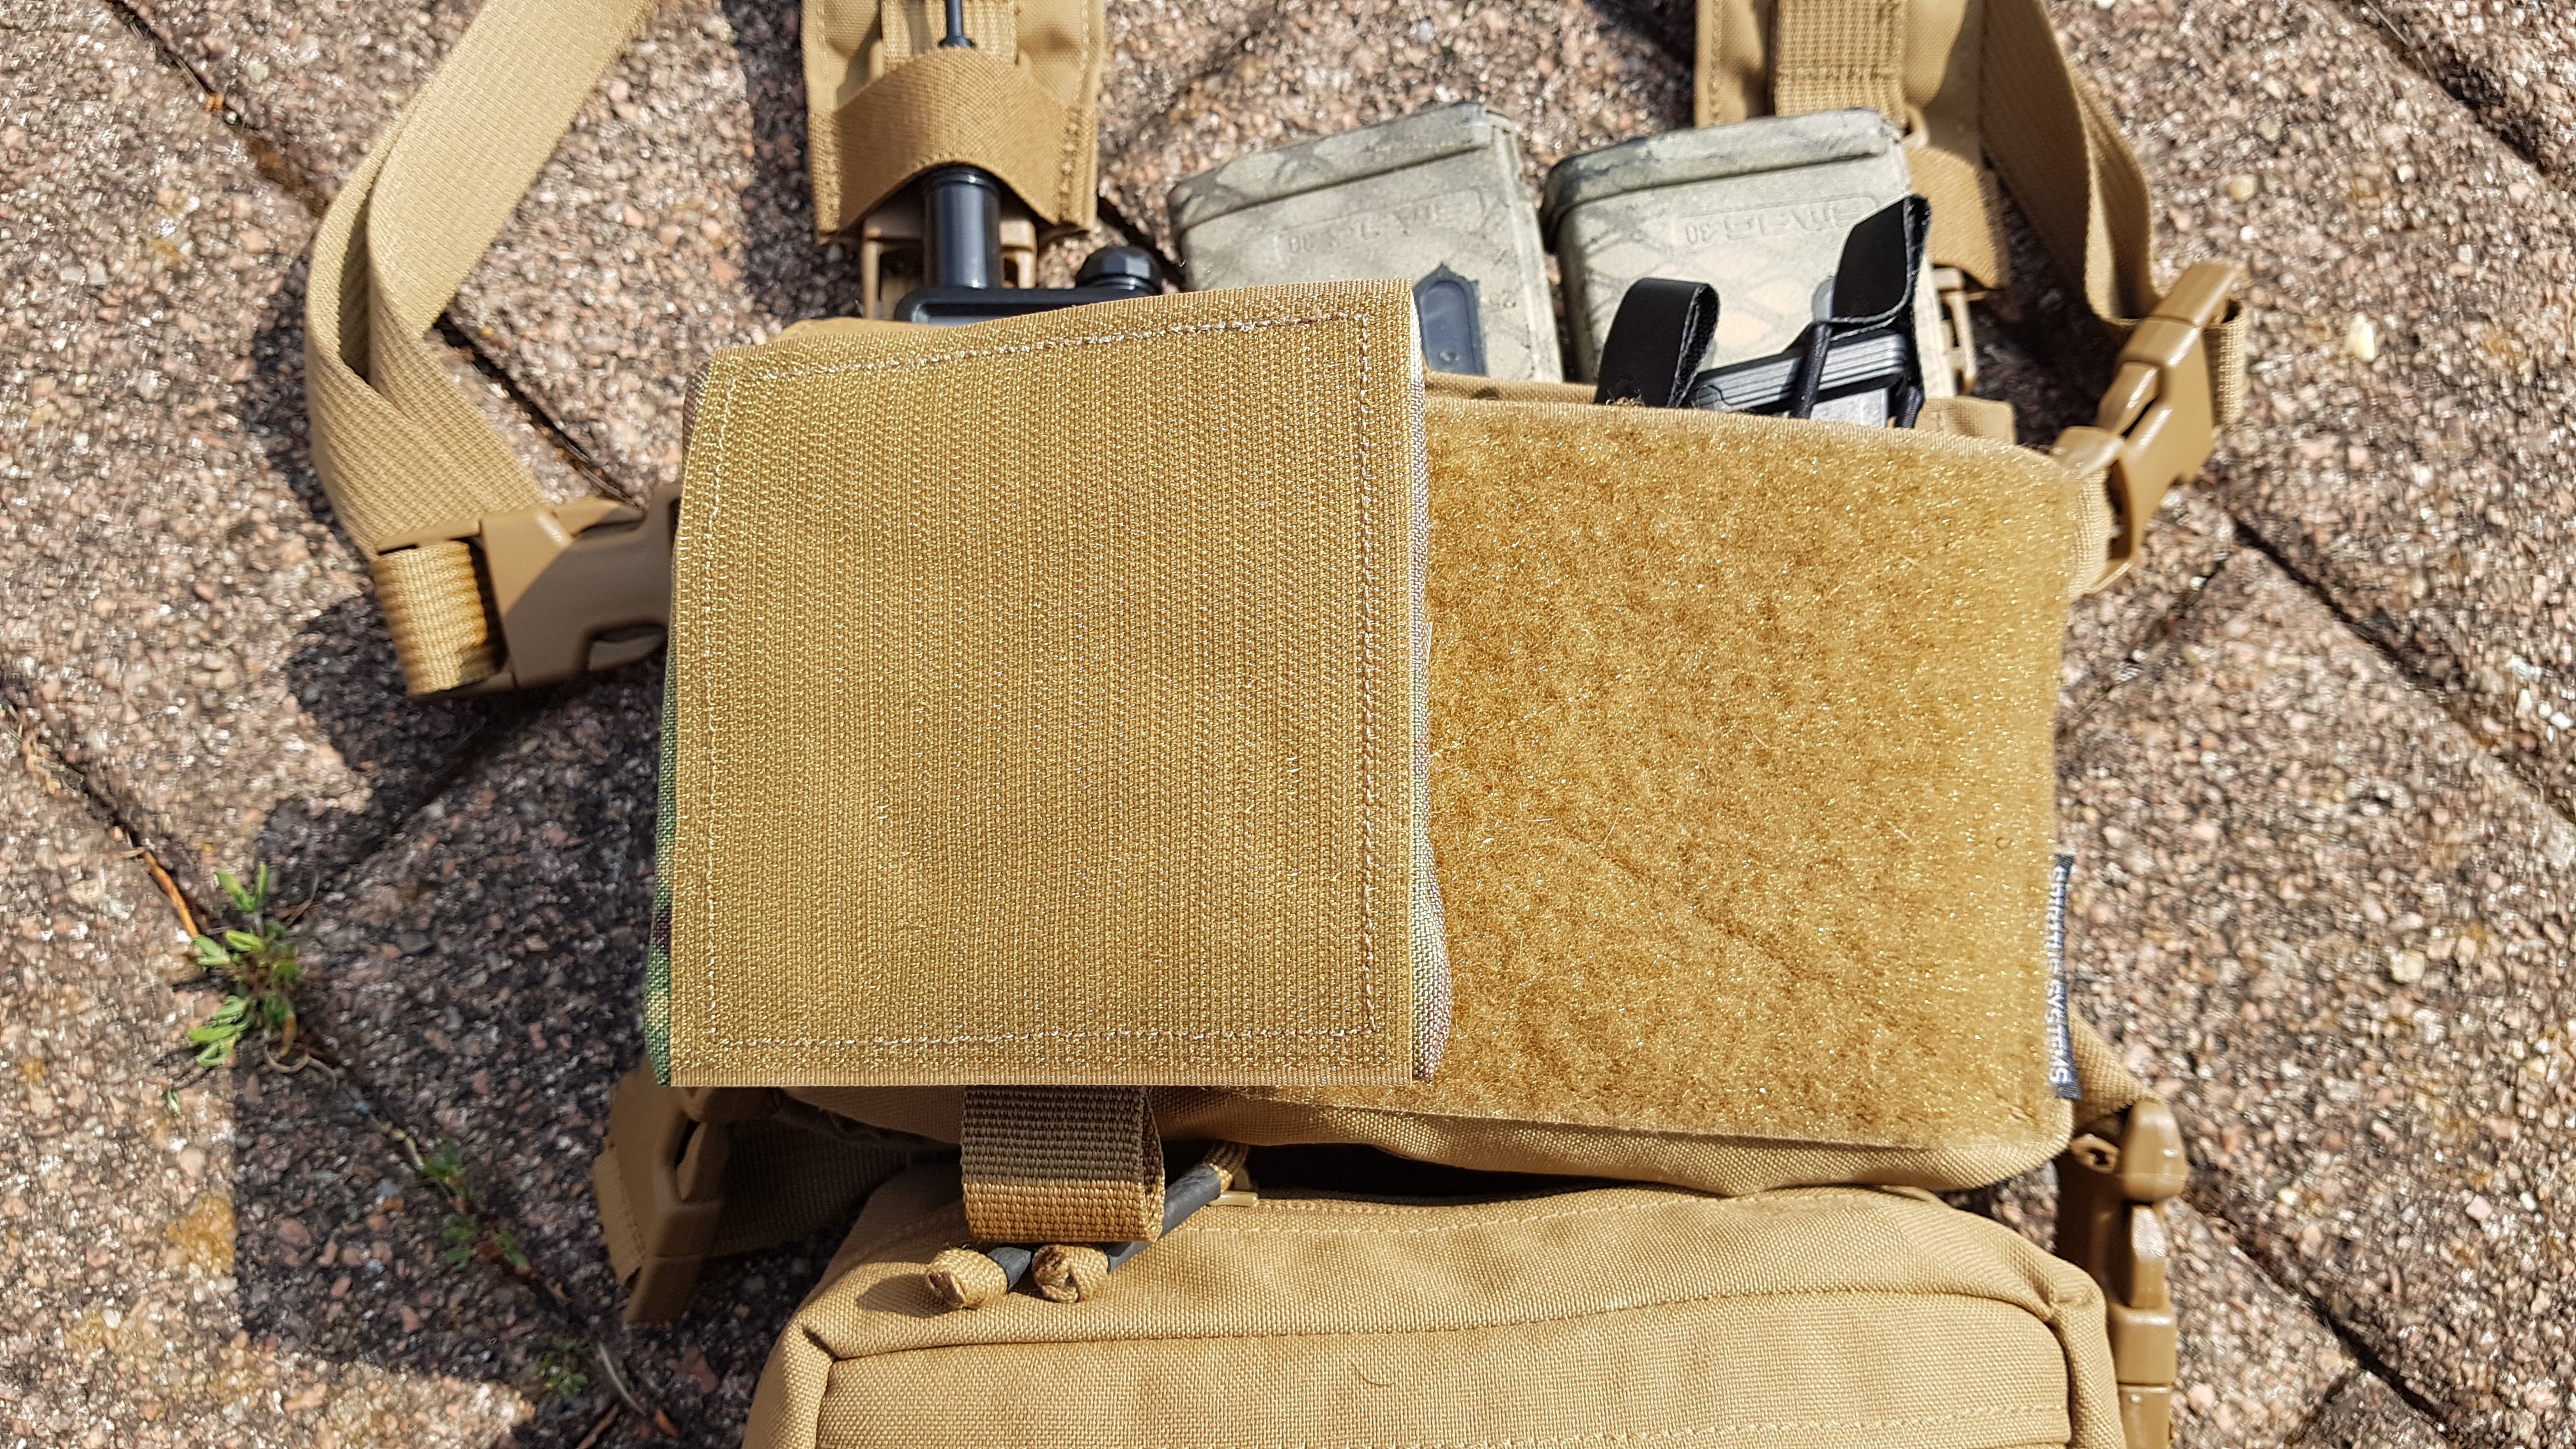
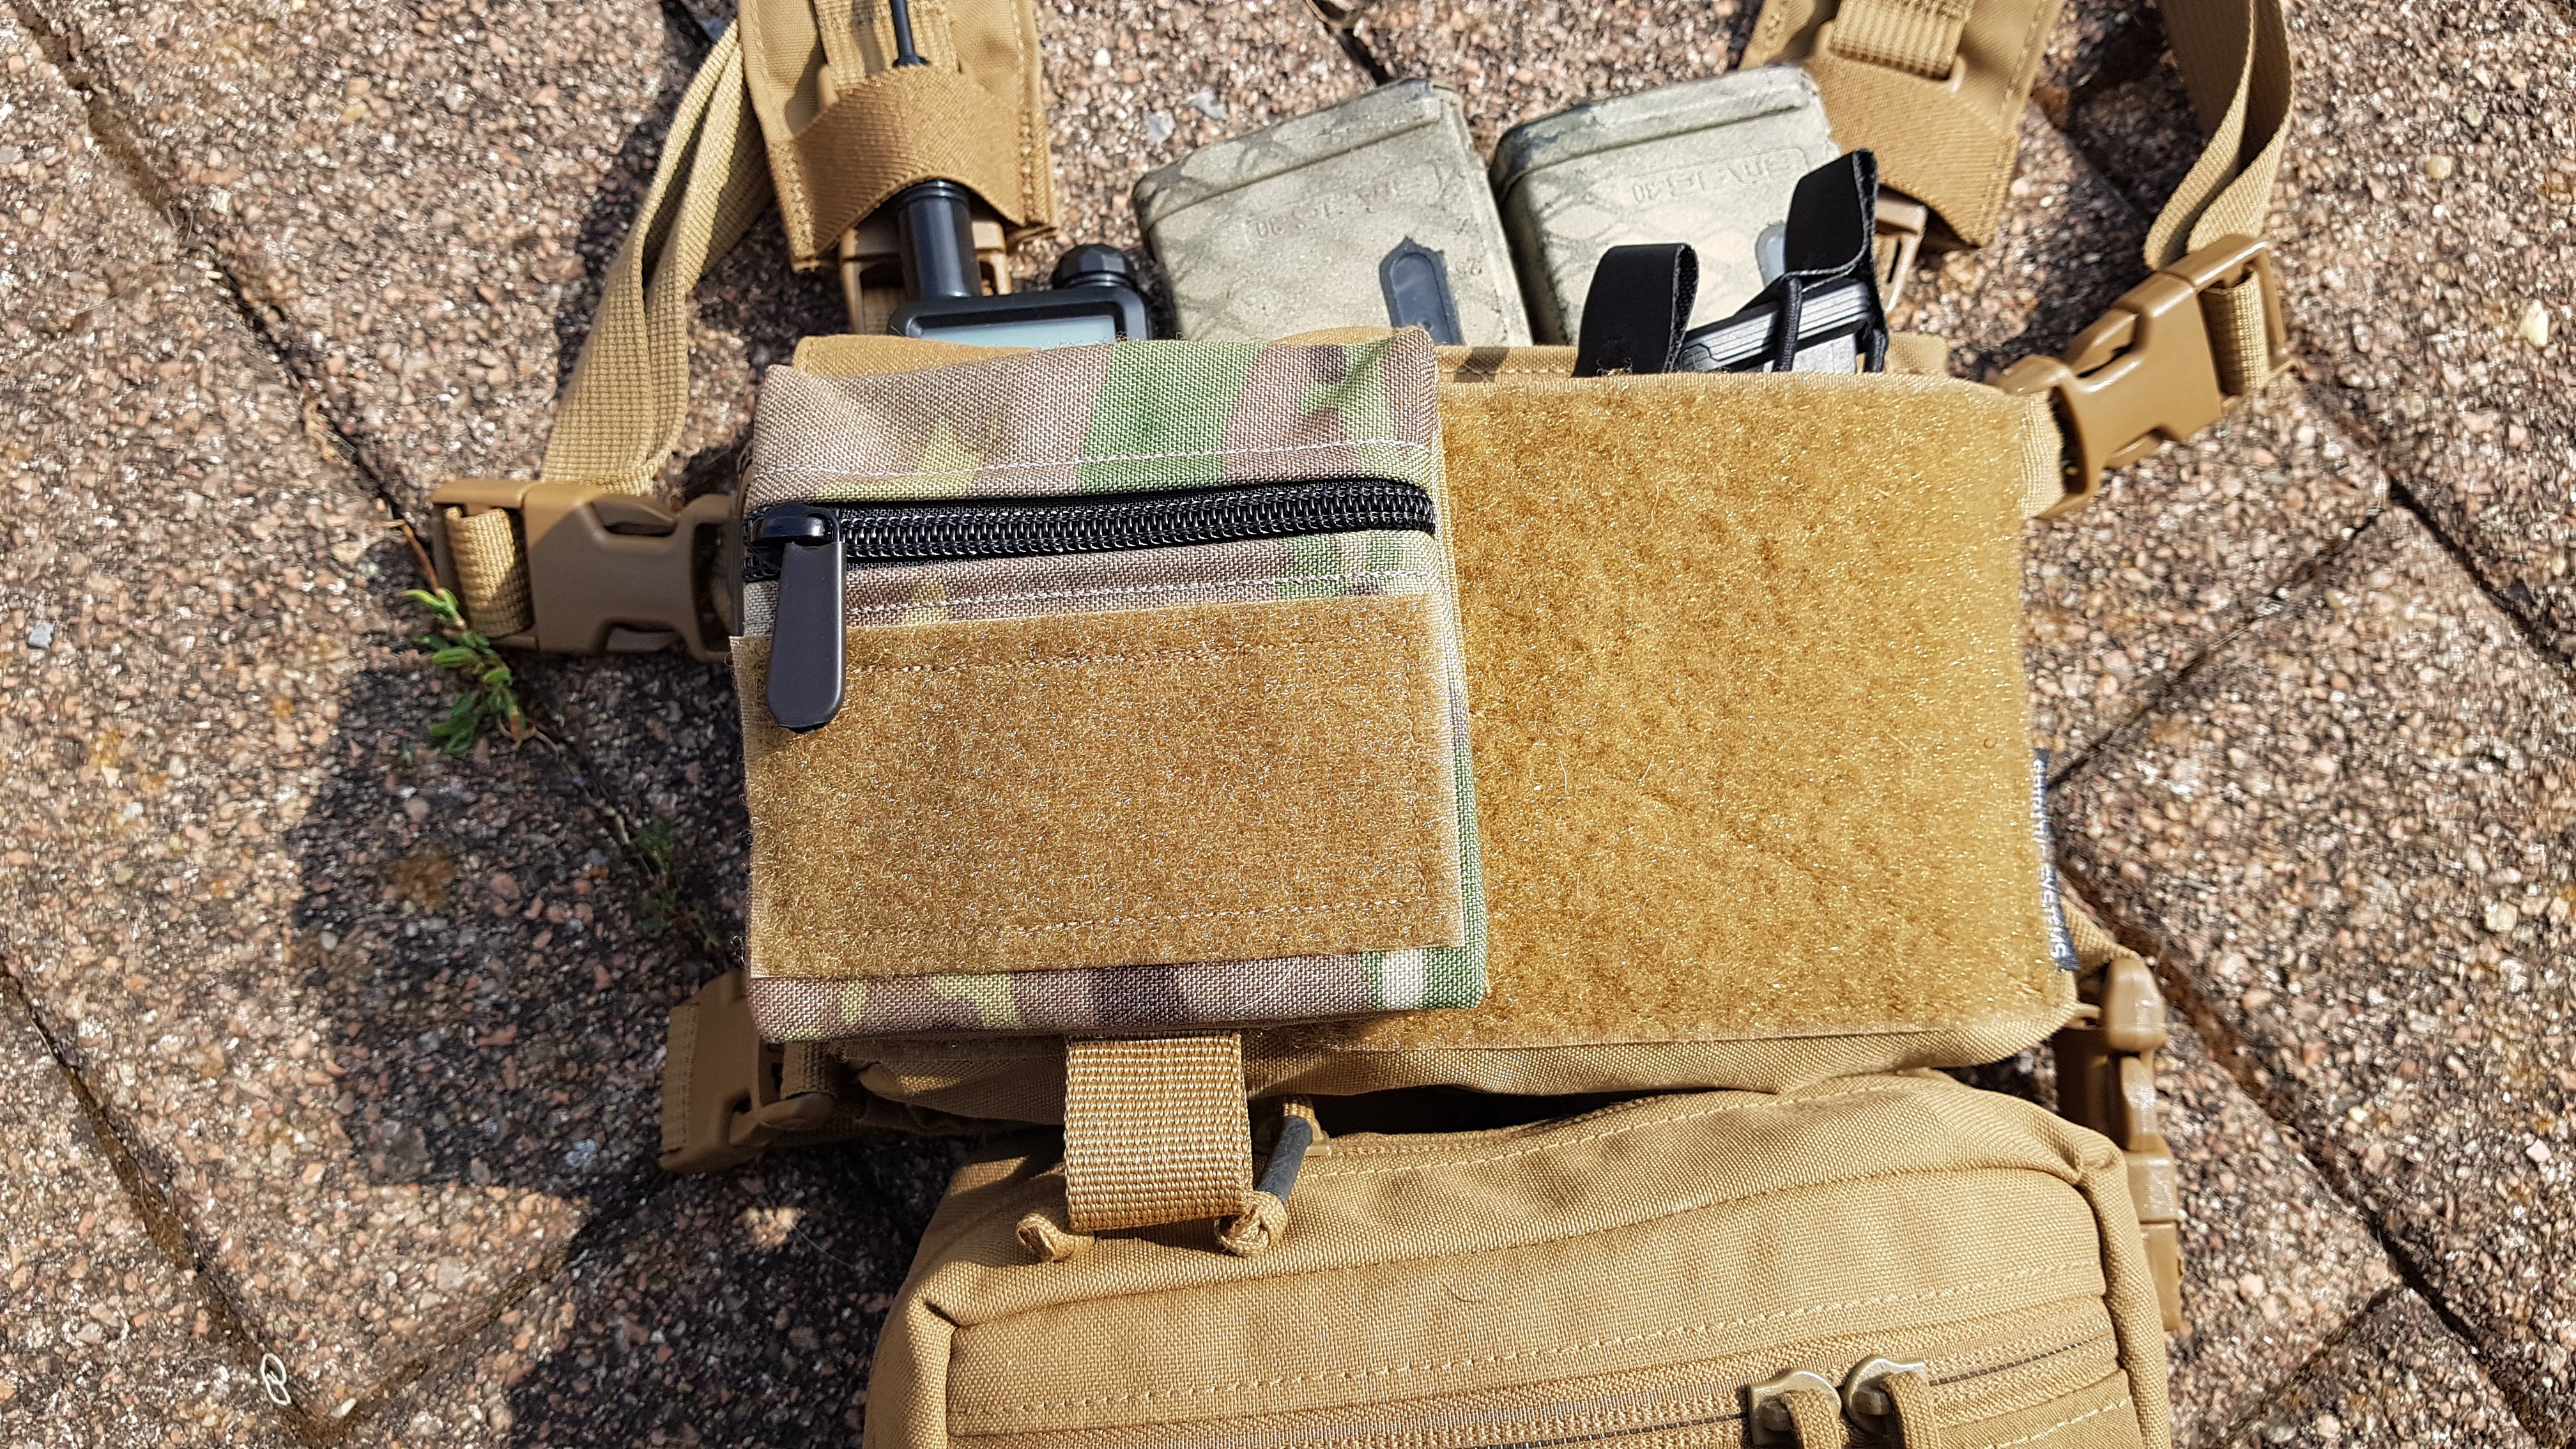
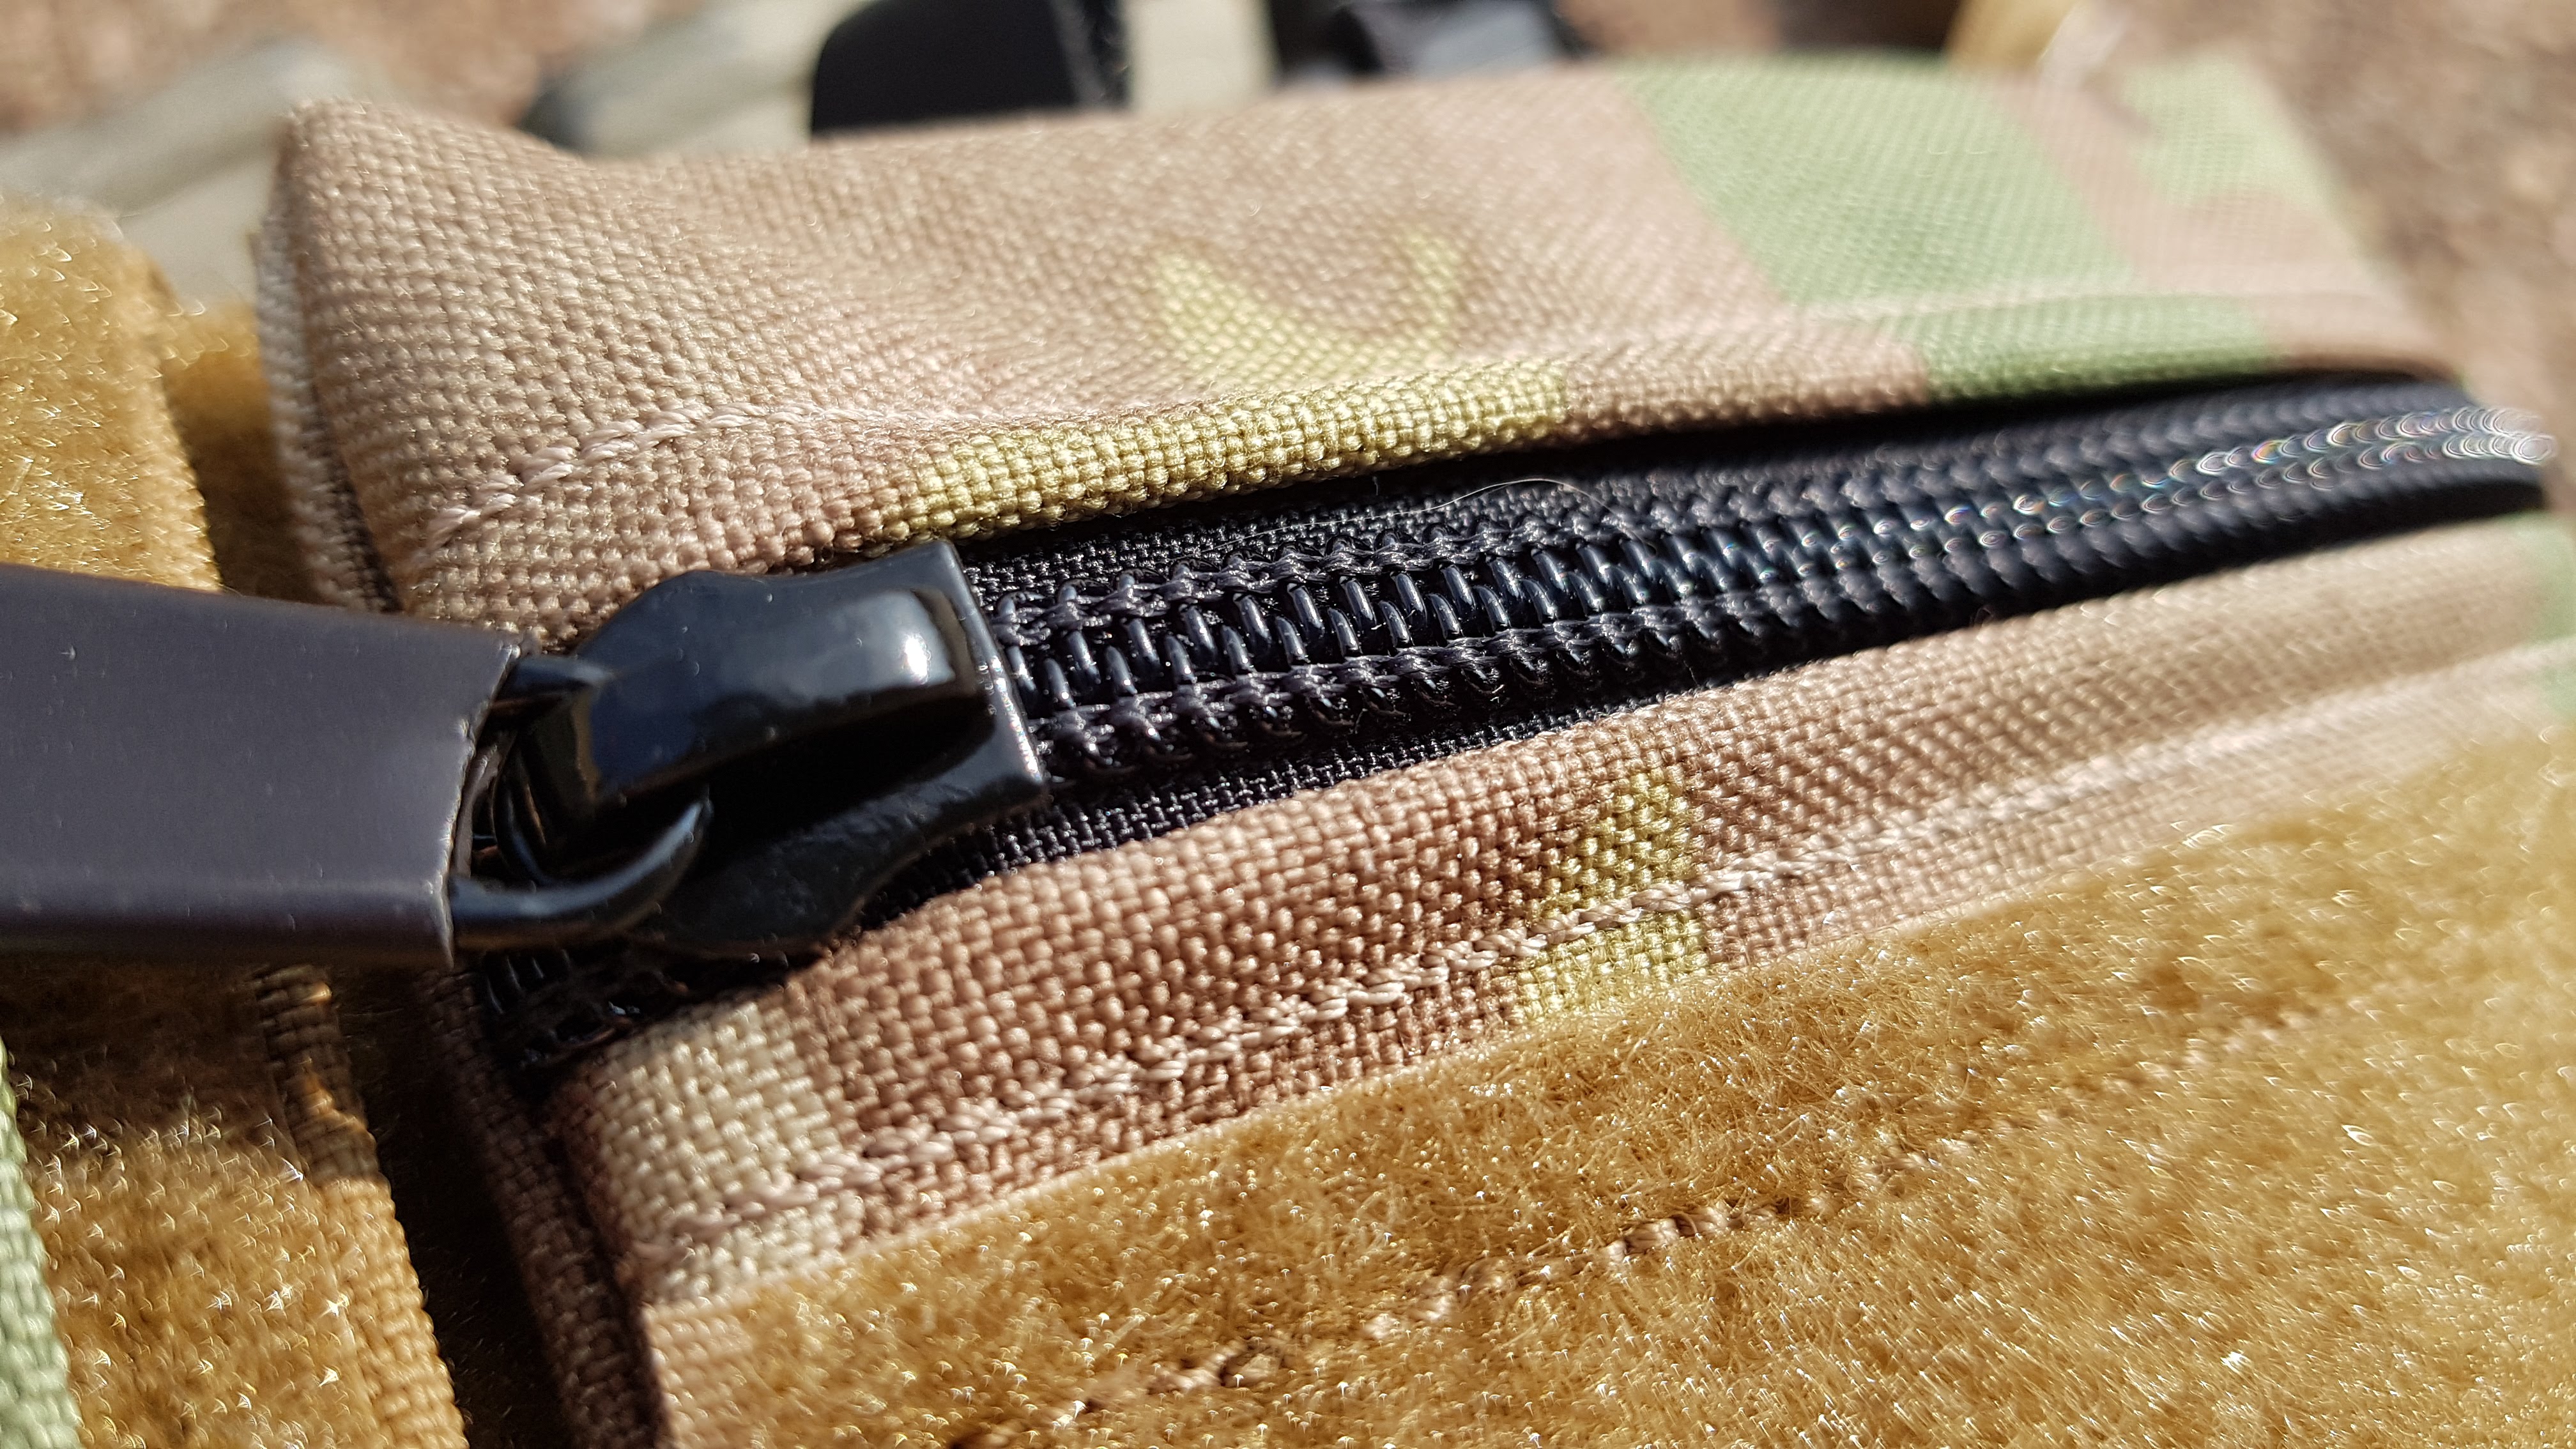
I got some female buckles from the awesome guys over at British Tactical to attach the Spiritus Systems Mk3 Micro Fight Chest Rig. As you might have seen on one of my IG pictures, I’ve added a Microbat Candy pouch to the front of it, as well as a zipper mod. The zipper mod turns the front pouch of the Micro Fight into a compact admin pouch. Perfect for my slate cards, römer and writing utensils. Using the buckles and the velcro panel, the Micro Fight Rig stays securely attached.

Chest area: KAGWERKS EUD case

Because the QRV was not greatly designed, the top molle strip is…not a molle strip, but velcro. Because of this any EUD case is hard to attach. I just cut a small piece loose and will sew the sides back closed in the future. Maybe.

The quick release system I was able to move away without hindering the use of the EUD case by KAGWERKS. I’m still able to use the QR system.

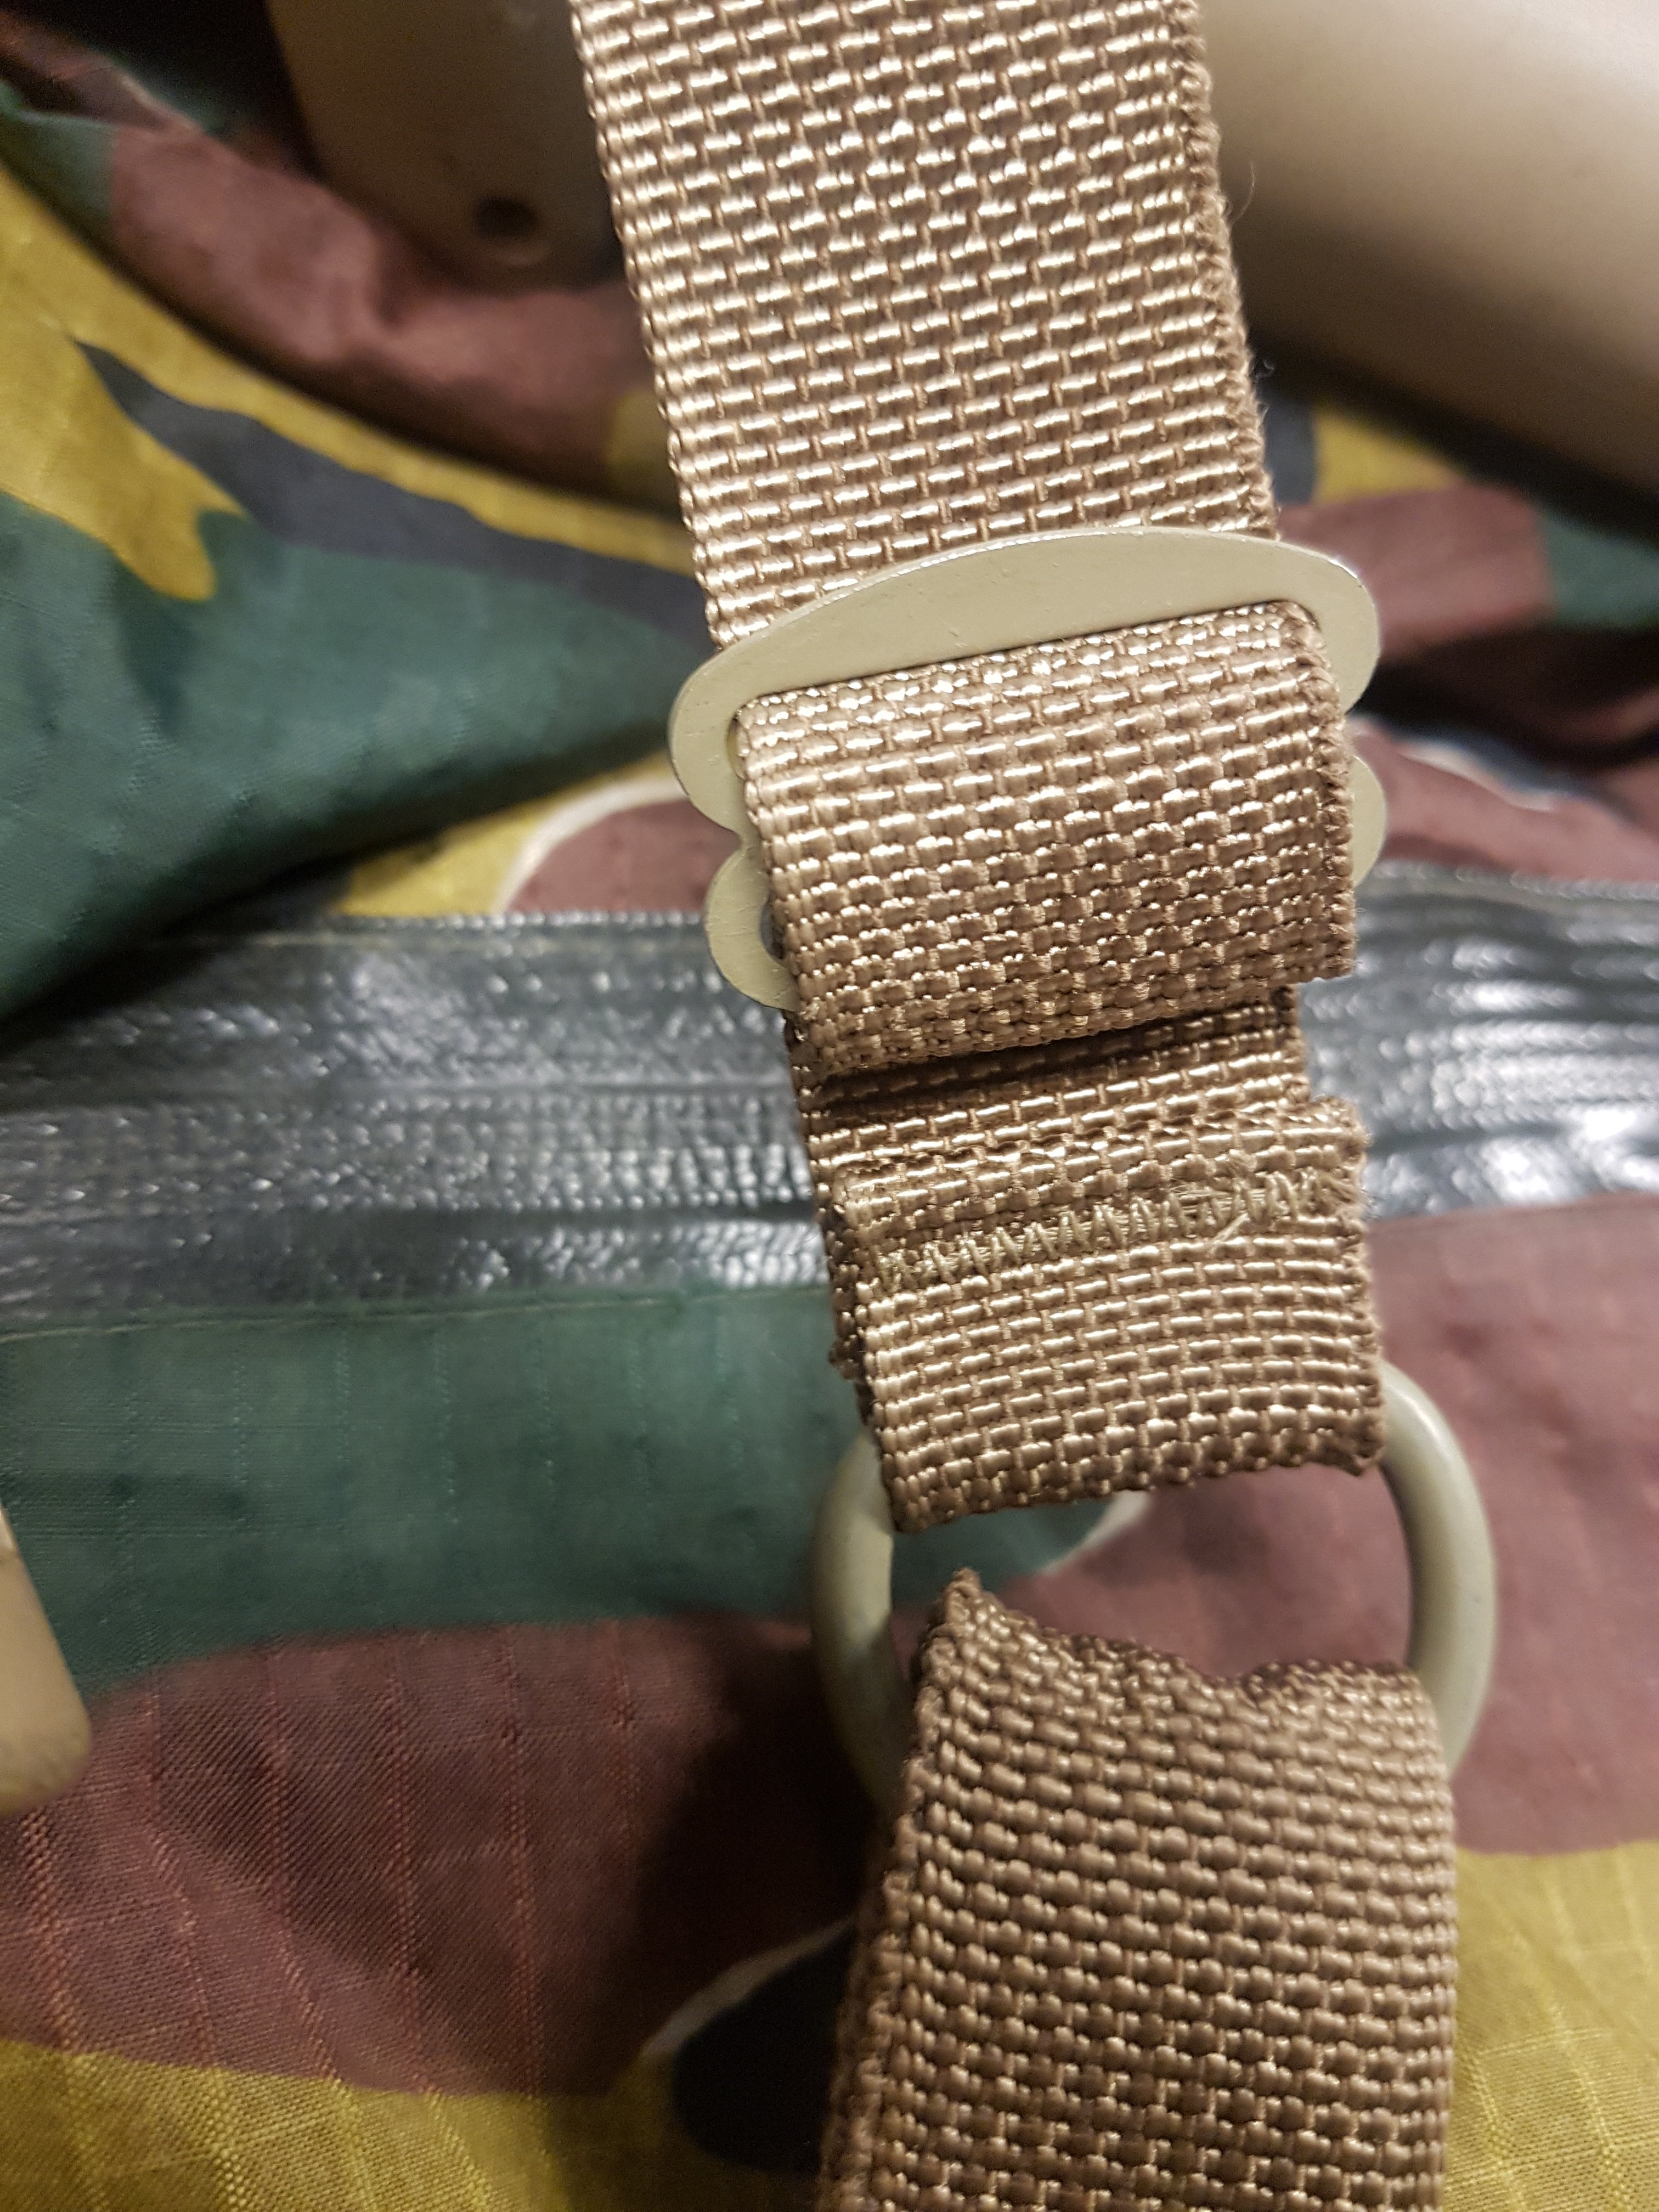
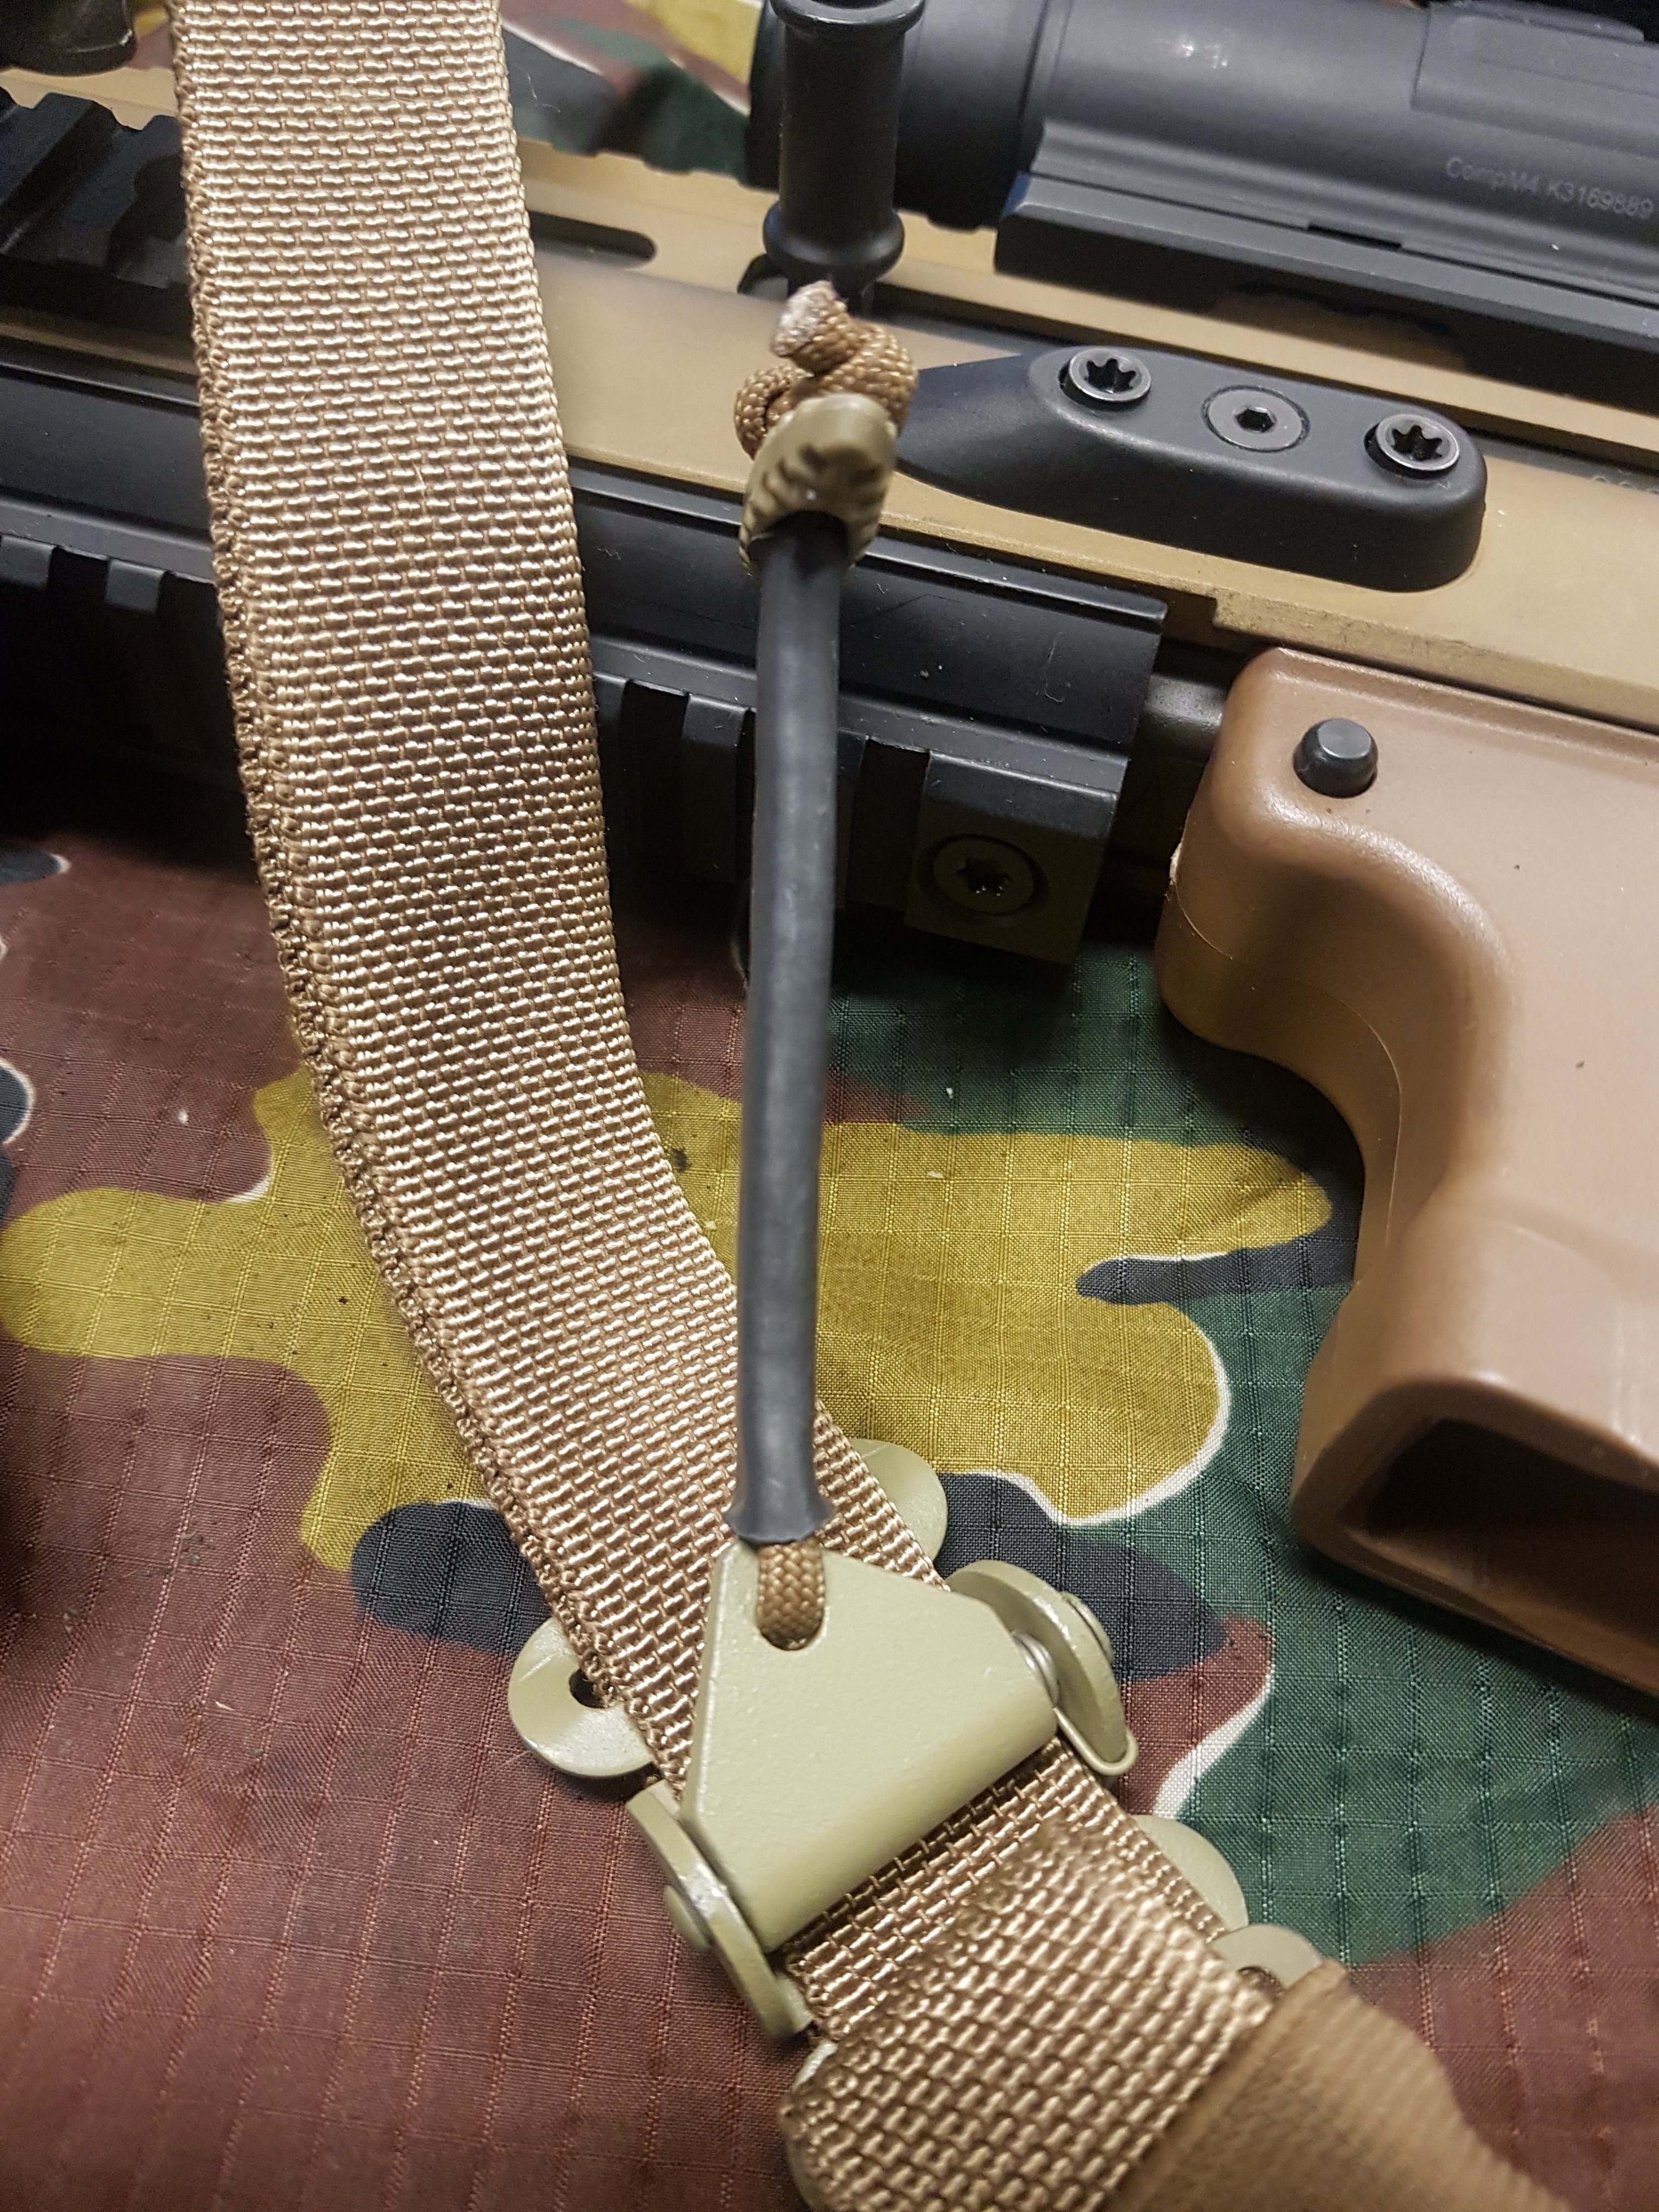
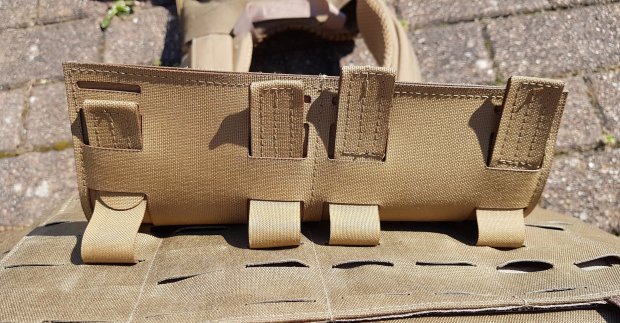
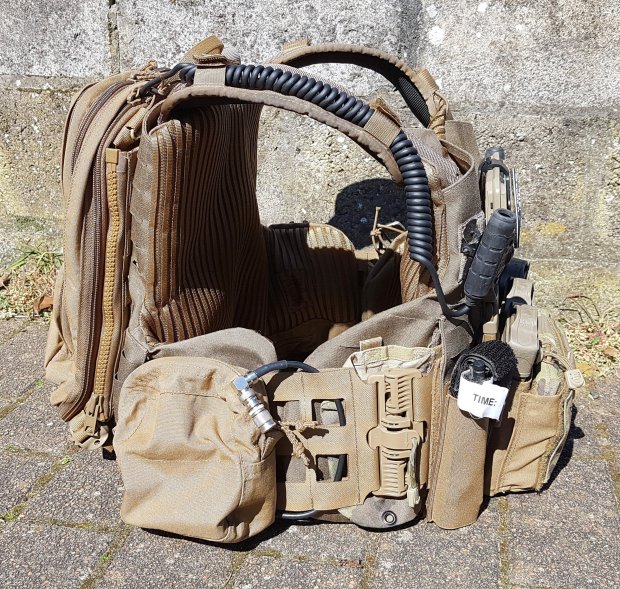
Cummerbund: Sumo Gear QRV Cummerbund

Because Sumo Gear saw the issues with the standard QRV cummerbund, he made his own.

It utilises ROC tubes and a lightweight, compact laser-cut material. Because of the tubes, you can just close those annoying snaps on the bottom of the flap and just use the tubes! This is so much easier and quicker!

On the back, he made a strech part so when you’re running or moving, the cummerbund allows you to move and breath. He also has 5 slits in the back, so adaptable for every posture, while still being able to use the quick release system.

Sumo gear also makes side pouches for the ABL side plates.

Shoulder straps: HSGI shoulder pads

My favorite shoulder pads have always been the High Speed Gear ones. They are comfortable, wide, but flat! Them being flat is the big reason I like them so much. They are very good even when wearing a pack. The HSGI ones are also very easy to run your cables trough.

So of course they had to replace the issued shoulder pads!

The HSGI pads work great with the QRV.

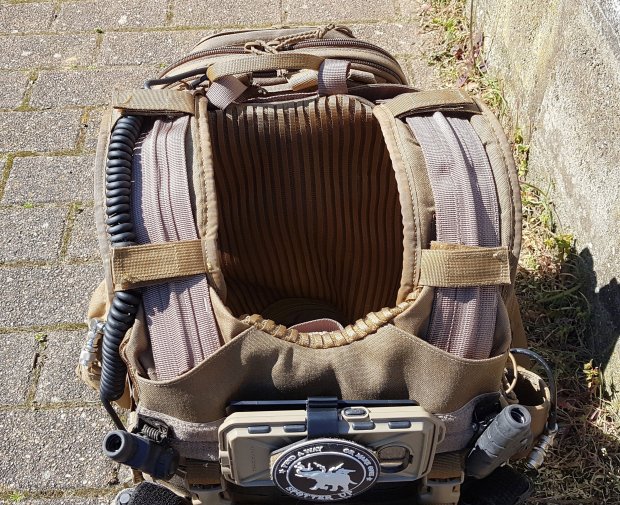
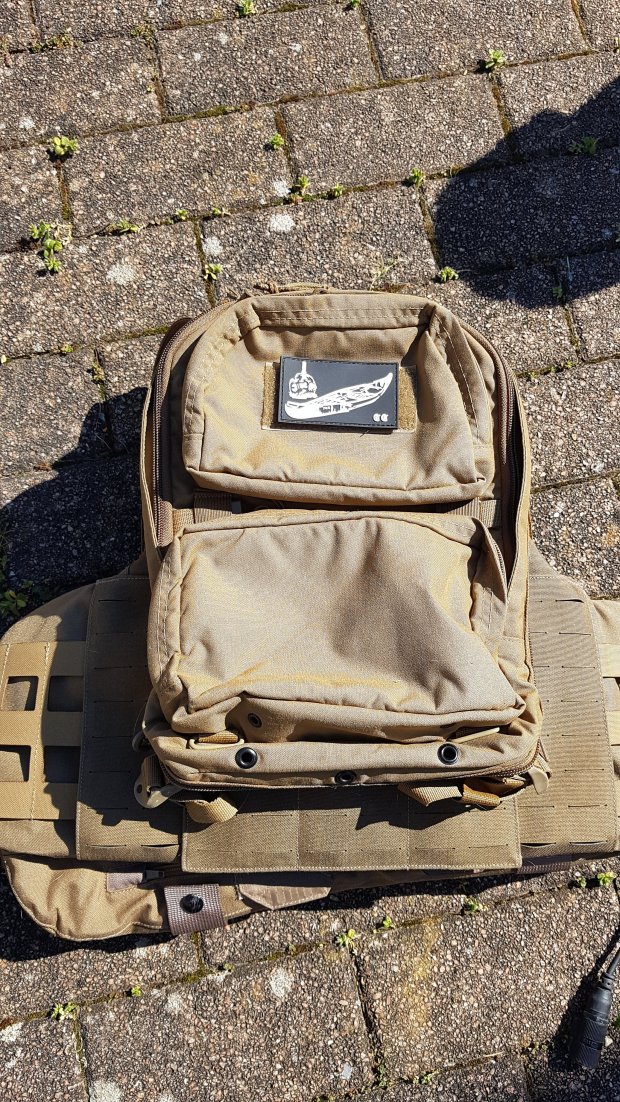
Backpanel: Tyr Tactical zip adapter.

As on my LBT 6094, I’ve installed the Tyr tactical zip adapter. This is because I carry the PRC-117G from time to time.

I wear my radio in the Tyr tactical Direct Action Assaulters Pack which zips on my back.

If needed, I can just wear the pack with the shoulder straps. I use it that way when I’m working with a vehicle.

The zip adapter gives you the possibility to change your back setup fast.

I also have the Raptor Tactical relocator pouches for my antennas. These have a lot of wear, but the guys over at Raptor have sent me a new pair! Great customer service.

Conclusion

Do these updates make the QRV a great vest, no. But it does make the vest a lot more versatile, adaptable, comfortable and modern.

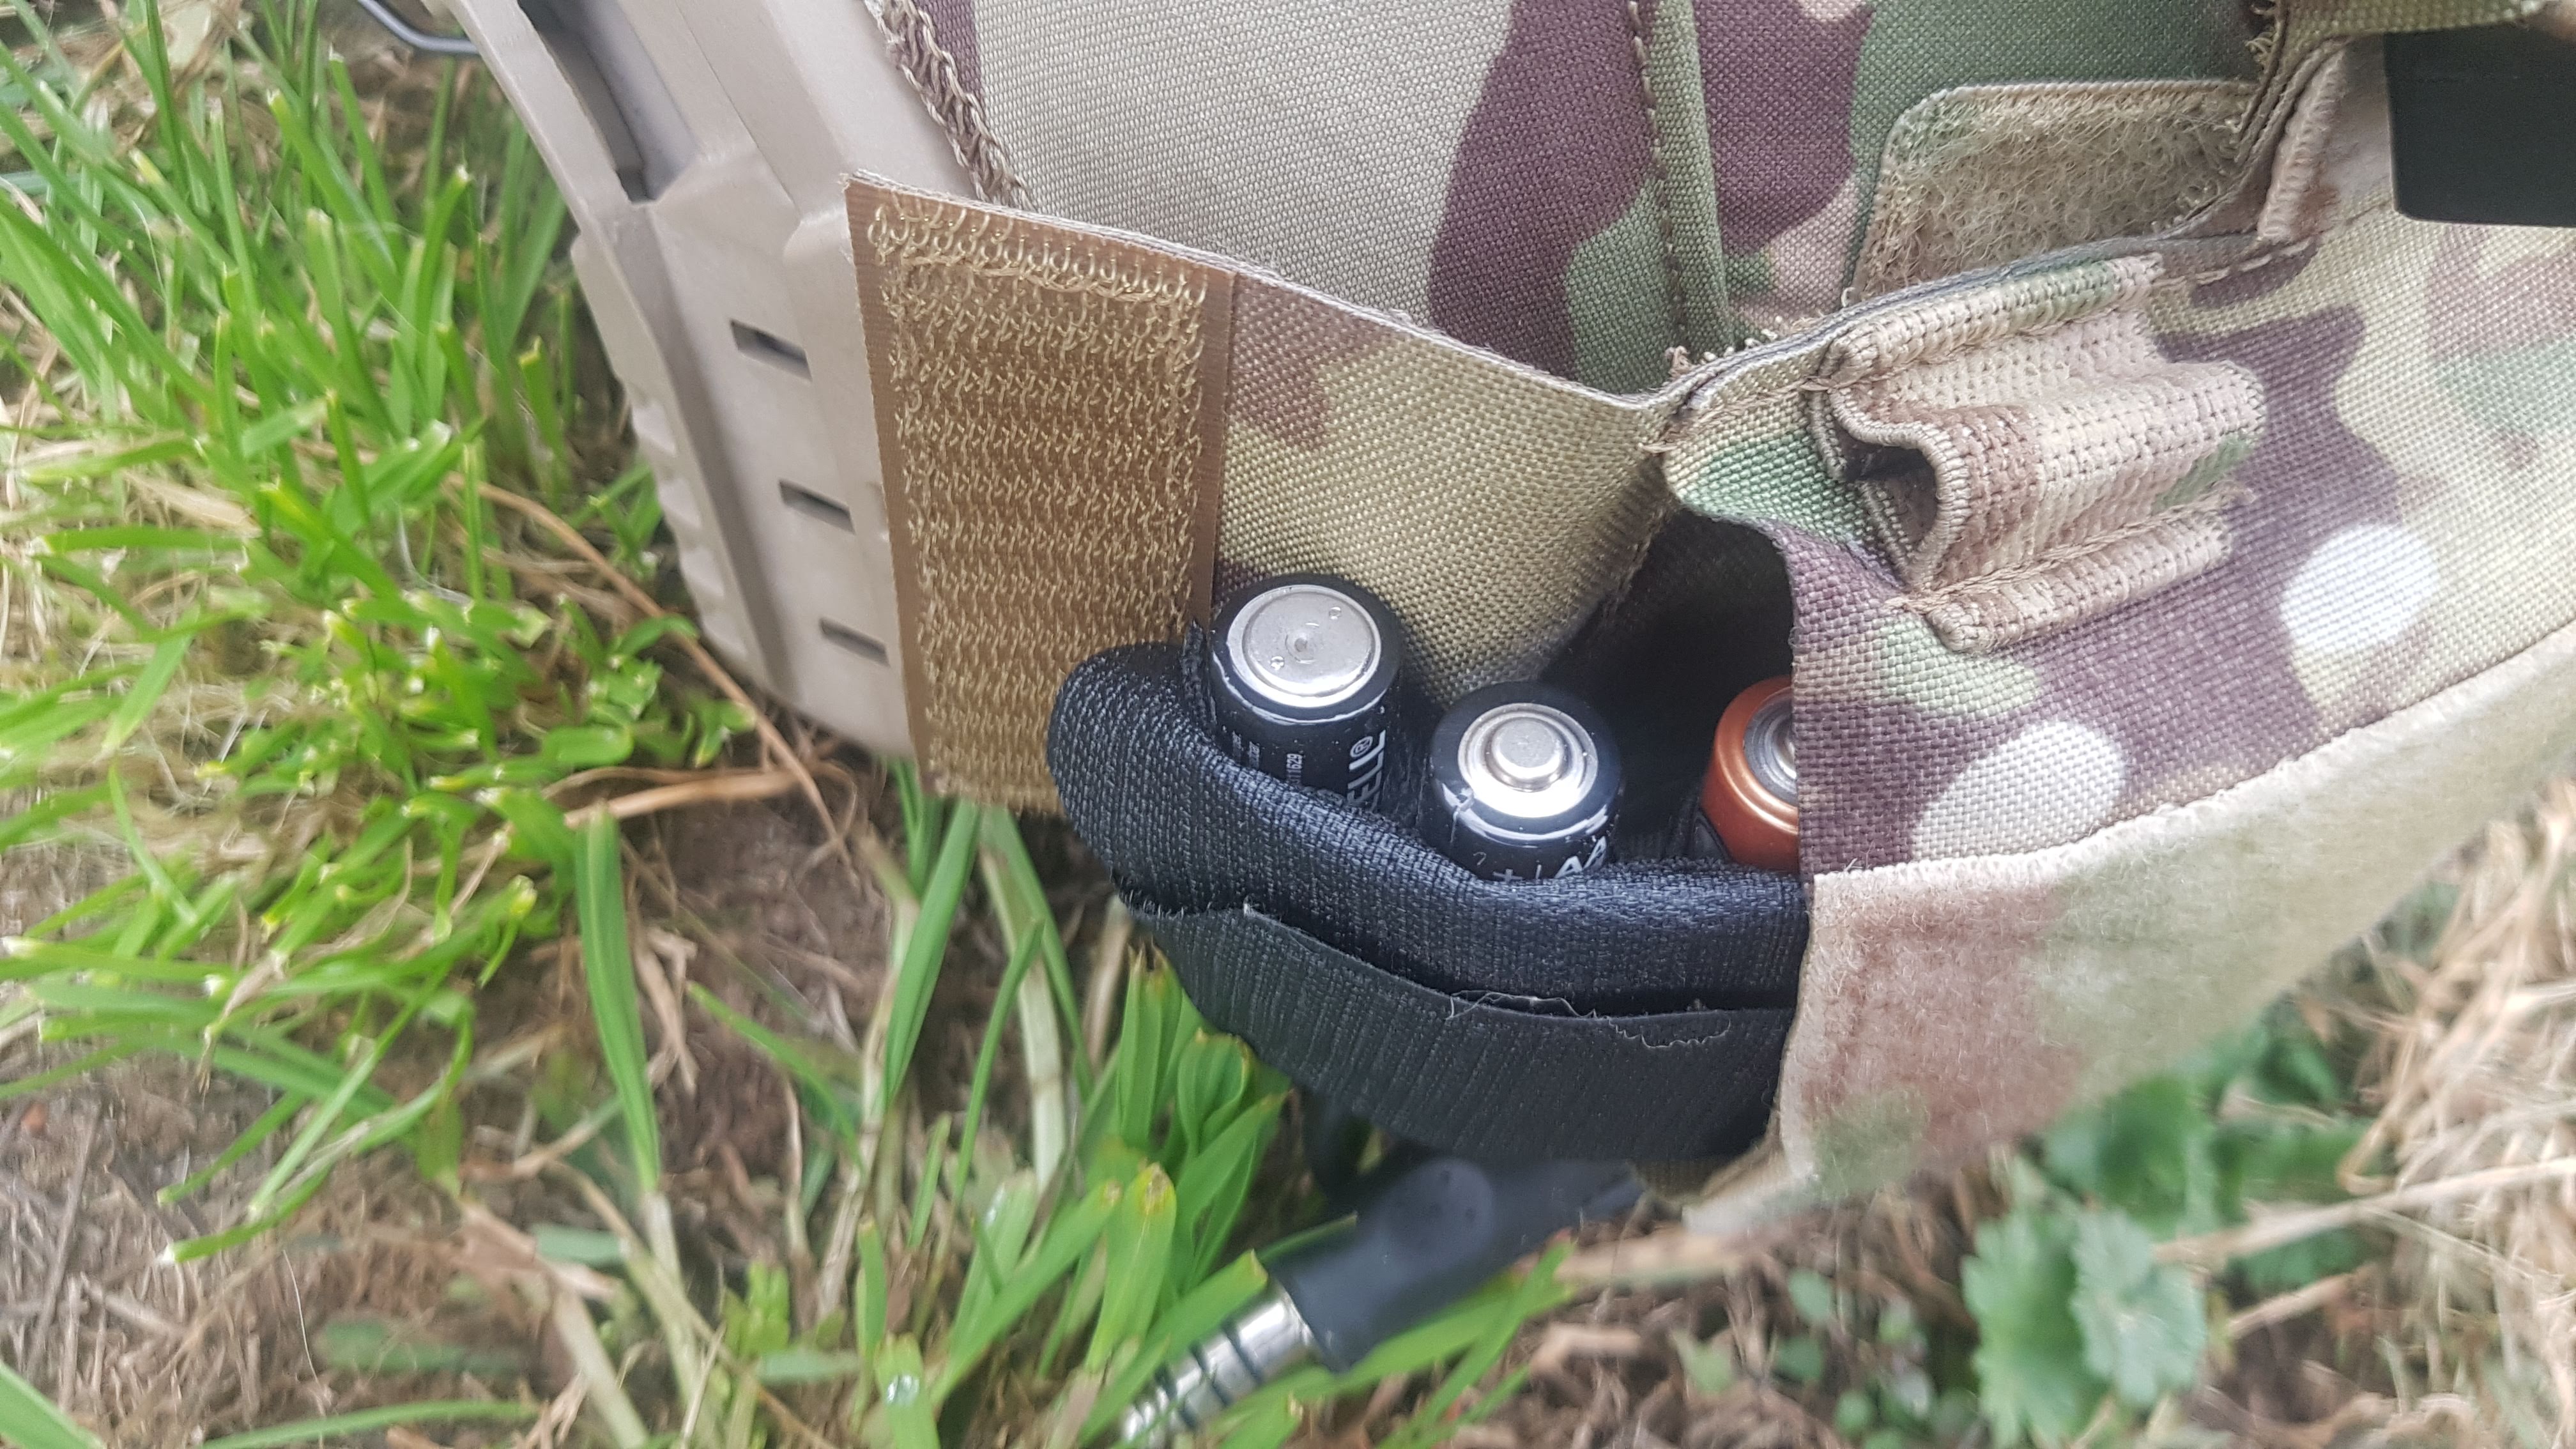
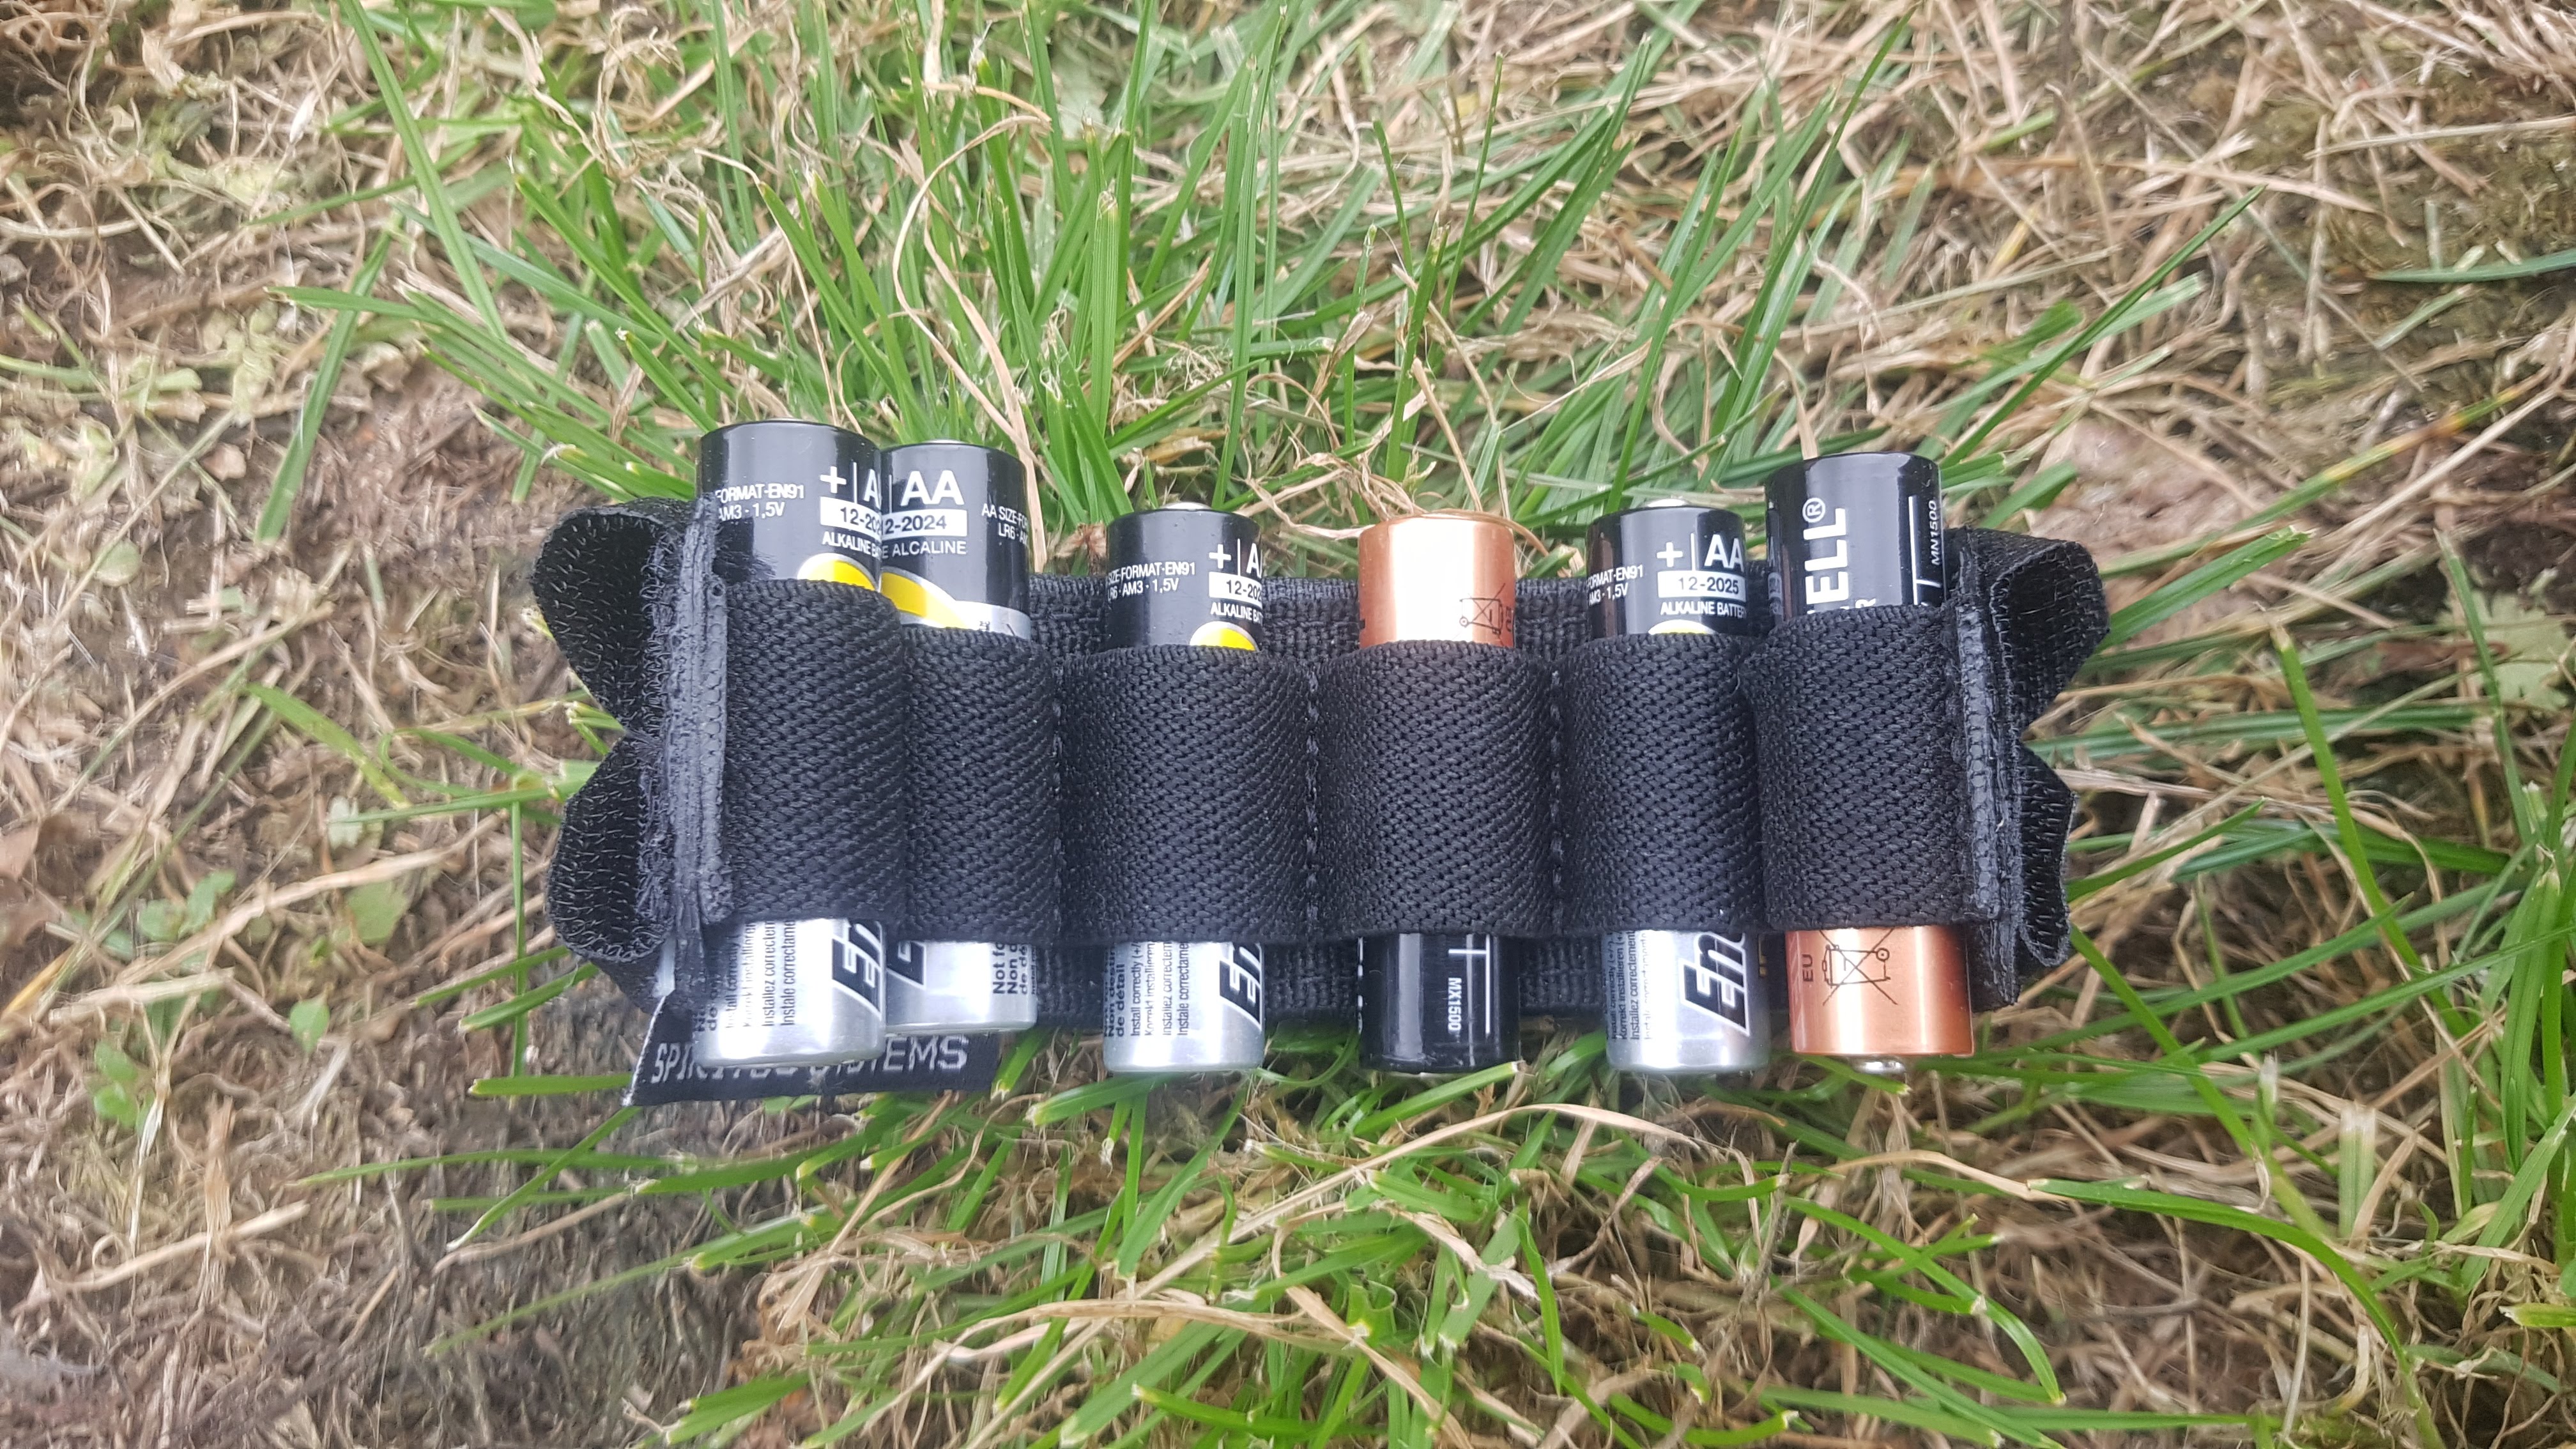
I set up some other pouches that I also had on my previous carrier. These hold my Izlid, PVS-14, extra Mics/ptt, batteries, etc.

If you have to use the QRV, take a look at these upgrades.

Disclaimer: I bought all these upgrades (excluding the Kagwerks case) with my own money and I’m not bound to write a positive review.

~ FMB

BLACKFOLIUM ISKIT

One of the pillars of survival is signalling and communication.

Signalling can be done in various ways, depending on the time (day/night), location and situation (emergency/tactical). As with your communication plan, you should have a PACE (Primary, Alternate, Contingency, and Emergency) plan for your signalling, while it being compact and lightweight enough to carry at all times.

Introducing the ISKIT!

The great Italian company BLACKFOLIUM sent me the ISKIT to try out and I was amazed by the innovation behind it. I’ve never seen a more complete, adaptable and compact kit like this.

Overview

The Individual Signal KIT (ISKIT) is, as the name implies, an individual kit that carries multiple ways to signal.

Pouch

The kit itself is carried in a lightweight wallet type pouch. Roughly the size of a pack of smokes when filled, it fits perfectly in the “dip pouch” of the Crye or Arktis combat pants. For the last year I’ve been carrying in that pouch of my Arktis C222 pants and I don’t even notice it’s there.

20200311_11523420200311_11523820200311_115308

20200311_115850

The pouch is closed by a Hi-Vis elastic attached cord that wraps around it. On the side, it has an elastic attached that can hold an Cyalume Chem light.

On the inside, there are two pockets. One is designed to hold the BLACKFOLIUM H70 signal panel ( included, more on that later). The other one is for a signal mirror ( up to 2×3″), button compass, survival blanket, etc ( these items are not included). Inside the second pouch, the Hi-Vis thin cord is attached that holds the Cyalume Chem light.

20200311_11532420200311_11534020200311_115409

The pouch is available in Multicam, black, coyote and green.

H70 Signal Panel

20190916_110510

A VS-17 panel is very know by most and is a good tool for daytime signalling. The problem is that a regular VS-17 panel can be heavy and cumbersome. The H70 Signal Panel by BLACKFOLIUM is their solution to this.

Packed up, this lightweight panel fit the ISKIT and is roughly 3,5″ x 2,5″ x 1″ or smaller. Folded out it’s dimensions are 27,5″ x 27,5″.

20200311_11552720190916_111030

One half of it is orange, the other half is magenta giving you the option to make certain signals.

On one side, there are two 1″ square velcro patches to attach IR or visual reflective patches.

On the four corners, there are loops and thin Hi-Vis cord attached to attach the panel to your pack or something else.

h70-panel

BLACKFOLIUM-H70-Panel4_1

Picture by BLACKFOLIUM

20200311_11553320200311_115536

Cyalume Chem Light

The ISKIT includes either an IR (military) or Green (military, civilian, rescue) chem light. The chem light is attached to the pouch with the thin cord as already mentioned, but can be quickly replaced.

The reason for the chem light is for your night time signalling. By swinging the chem light in a circular motion, you can create a “buzzsaw” that can be seen pretty far with NVG’s. I’ve tested it with this one under NODs and using the pouch as a handle and it worked flawlessly. Because the cord is also sewn to the inside of the pouch, it won’t fly away.

20190916_11054520200311_115406

Opinion – review

The ISKIT solved the gap in my survival kit. I did have a heavier signal panel in my Smock vest, but it was far from ideal so I usually did not carry it.

I currently carry in my ISKIT the following:

  • H70 panel
  • IR chem light
  • Square signal mirror
  • Survival blanket (to be added)
  • ESEE survival cards (to be added)

Because the ISKIT is so small, lightweight and complete, I have been carrying it permanently in my combat pants.

The kit itself is very well made and designed. The communication with BLACKFOLIUM has been perfect and they usually have a bunch of them in stock.

In my opinion, If you are in the military or do some hikes, mountaineering, etc you need a good way for emergency signalling and the ISKIT would be my advise. I carry it while working, but will get another one for my hiking backpack.

I have advised this kit to a lot of people already because I really like it.

You can find the ISKIT here

You can find the H70 here

20200311_115238

Disclaimer:

BLACKFOLIUM provided the ISKIT to me for free. As always, I’m not paid by them and the review is unbiased.


British Tactical Mag Pouch Radio Insert

C360_2018-09-21-13-28-46-591

Sometimes different missions call for different gear setups. Sometimes I run 1 PRC-152 & 1 PRC-117G in my backpack, sometimes I run 2 PRC-152’s. The ability to change setups easily is thus desired.

C360_2018-11-16-10-56-40-987

With the radio insert by British Tactical, this is done easily. Just switch out the flap on their Mag Pouch with the radio insert and you’re good to go!

If I don’t need an extra radio, I can just put the flap back and increase my magazine amount with 2 extra mags.

20190717_110005.jpg

20190717_110021

The insert is very adjustable, either with the bungee cord on the back or with the Velcro tab on the front.

20190717_110009

The backside is attached with a soft velcro strap.

20190717_11005420190717_11012620190717_110106

The front is made of a lasercut piece, backed with hook Velcro.

20190717_11013320190717_110129

As always with British Tactical, the quality is top notch! Even in the most simple of things, they strive to get towards perfection.

The radio insert works great with the PRC-152, is easily adjusted and uses the mag pouch that you have already attached. A small piece of kit, that is worth a look.

British Tactical Radio Insert – Currently not listed on their website.

~FMB


MICROBAT SYSTEMS Candy Micro Gen 2 Pouch

20190717_104710

Recently, the use of small chest rigs has been on the rise, again. This time not being used by MACV SOG in the jungles of Laos or by the Rhodesian Selous Scouts in the bush. Nowadays, the small chest rig is seen from civilians to SOF operators. This time, the more known versions are the Haley Strategics D3CR, the British Tactical Chest Rig and maybe the most famous of them all, the Spiritus Systems Micro Fight Rig.

With the increase in popularity, there is also an increase of “aftermarket” products for these chest rigs.

In comes MICROBAT SYSTEMS. Microbat is an American company that reached out to me to have a look at their Generation 2 of the Candy Micro pouch. I was delighted because the pouches got my attention after they started popping up on the Spiritus Symptoms FB page.

After a small week, the Multicam version arrived in my mailbox and I have to say I’m impressed by the craftsmanship.

20190717_104724

20190717_10512420190717_105116

The Candy Micro is a small pouch with a Velcro backing that can attach to the front of the Spiritus Micro Fight. Of course due to the velcro backing, you can also attach it to the back of your helmet, velcro panels, plate carriers and all in between.

20190717_104724

20190717_10481520190717_10482320190717_104837

The pouch also has a Velcro hook panel on the front to attach IFF, moral or your cool-guy patches.

20190717_104937.jpg

20190717_105049

Inside is just a simple black lining.

20190717_10480520190717_104801

The zipper is covered in a rubber to minimize the sound it can make.

So what is it’s use?

I will be using it for spare CR123 & AA batteries to run my NVG’s, Surefire, MS2000 and Petzl headlight.

You can of course use it to store your favorite candy as the name suggests… or just condoms or morning after pills for you ladies.

20190717_104741

All in all, it’s a usefull little pouch that fits perfectly on the Micro Fight.

I’ve seen these available in Multicam, Multicam Black, Multicam Arid, Coyote, Wolf Grey, Ranger Green & M81.

Microbat currently doesn’t have a website, but they’re working on it. If you’re interested in this pouch or one of their other offerings ( like a cool NVG tethering pouch), hit them up on IG!

MICROBAT SYSTEMS IG: @microbatsystems

~FMB

20190717_104719.jpg


British Tactical: 5 inch ‘Mad Jack’ Knife Sheath

“Any officer who goes into action without his sword is improperly dressed.”

John Malcolm Thorpe Fleming Churchill AKA Mad Jack

IMG_20180921_140136_296

It’s easy to understand why this knife sheath by British Tactical is named after Mad Jack.

If you don’t know Fighting Jack Churchill or Mad Jack, look him up. It will be a good read.

IMG_20181103_131437_398

I received this knife sheath from British Tactical to use with my SOG SEAL PUP knife. Since receiving the sheath, I’ve switched knives. Lately I have the excellent Casström Lars Fält knife on my belt to use it as a bushcraft knife when out on the field.

Luckily for me (and because I did the research) the Casström knife fits perfectly in the sheath.

Now let’s talk about the sheath itself.

What is it made of?

The pouch itself is made with Cordura and has some Laser cut 500D Laminate on the front and back.

20190522_135057

Looking at the cordura sheath, you can see it’s built like a tank! with an extra edge for added durability. Just look at that stitching!

20190522_135152

The laser cut laminate MOLLE grid on the front and back correspont to eachother. Because of this you can “sandwich” the sheath between your belt and another pouch with ease! On the front, behind where your knife handle would be they attached a vertical piece of laser cut laminate with loop velcro on the back. This it to attach the velcro retention, but we’ll talk about that later.

20190522_135217

20190522_134952

I currently use the front laminate to attach my Hultafors fire steel.

How can you attach the sheath to your gear?

On the back, there is a Molle attachment system that covers 1 MOLLE width and 5 MOLLE height (9 total coverage). So it can be securely attached when using a wide belt or backback without it taking up a lot of space in width. I have it attached to my SUMO GEAR belt and it’s very secure. At the end of the strap, British Tactical has attached a small strip of plastic that aids in the routing of it.

20190522_13513520190522_135144

How is your knife secured?

There are three ways of securing your knife:

  1. Velcro strap
  2. Elastic band and tab
  3. Combination of the velcro strap and the elastic band

I use the combination of the velcro strap and the elastic band because the Casström knife has a pretty slippery handle, resulting in the elastic band slipping off. But to each it’s own.

20190522_13505720190522_13510620190522_13511620190522_13521720190522_135230

Is the cordura enough to protect you and the knife?

Of course not! Because everyone knows that a good knife is a sharp knife! Sharp knives can cut through cordura, so British Tactical has made an HDPE card insert that covers the complete blade. The insert just slips into the sheath and I have never had any issues with it. Having the only “hard part” of the sheat on the bottom also helps with the comfort. Sitting in a vehicle with a knife sheath attached to your belt can be troublesome, but the knife can move out of the way while still being secure!

20190522_14274720190522_142757

Some specifications from British Tactical:

Pouch Weight:

  •   68 grams (Without Knife)

Pouch Dimensions:

  • Width – 6cm
  • Height – 25.5cm
  • Depth – 1cm (with card)

Blade Dimensions:

  • Length – 5 inches
  • Width – 1 1/4 inches
  • Hand Guard length – 4 1/2 inches

MOLLE Attachment/Coverage:

  • Attaches to 1 wide by 5 high.
  • Covers 1 wide by 5 high.

Conclusion

I like this sheath. It does what it needs to do and is customisable to your needs for securing the pouch and the knife.

It’s available on the British Tactical website in Multicam, black and of course Coyote Brown for £24.60. They also have 6 and 7 inch version, as well as one specially made for the SA80 bayonet.

I’m now thinking of buying a Multicam one for my outdoor belt.

If you’re looking for a good sheath for military or outdoor use, go check this sheath out!

British Tactical 5 Inch ‘Mad Jack’ Knife Sheath

British Tactical Reviews

~ FMB

British Tactical – Chest Rig Triple Mag Insert

C360_2018-11-16-10-56-40-987

One of the accessories or add ons for the Low Profile Chest Rig by British Tactical is their Triple Mag insert.

You might think “Oh no, another generic elastic mag insert with some bungees”. Well, then you haven’t taken a good look!

IMG_9244

The insert fits perfectly in their chest rig. It’s made a lot different from the other inserts I’ve seen.

Usable with 5.56 & 7.62 Mags, it has angled sides to separate the three magazines and prevent snagging when taking them out.

IMG_9229

On the front, there is a loop strip of velcro. The back is covered in hook velcro. This means it can be securely attached inside the Low Profile Chest Rig, as well as some other plate carriers.

IMG_9234.JPG

IMG_9243


On top of the front and back pieces, there are laser cut laminate cord attachments for the supplied elastic bungee cords with pull tabs. These are great if you need the extra retention.

img_9235.jpg

Talking about retention, the inside of the insert is covered with a felt-like loop velcro. This allows you to attach kydex inserts. I’ve been using the kydex inserts and they work flawlessly. I still use the bungees, but that’s because I use this setup as a recce rig and I want the extra retention.

IMG_9237

IMG_9238

20180816_200643

Having your magazines securely attached inside the rig, means you open up some real estate on the front it. Because of that I was able to add an admin pouch. If you would like to add more magazines, British Tactical also has an admin insert which looks promising!

Small_pouch_03__69923.1540674288.1280.1280

Photo courtesy of British Tactical.

The Triple Mag Insert has an innovative design and is made in the UK.

Current price is £18, which is very decent!

The insert can be found here.

~ FMB


British Tactical

C360_2018-09-21-13-28-46-591

Gear companies – Every day a new one emerges and another dies down.

From time to time you find a manufacturer that provides quality gear for a decent price. Even rarer is finding such a manufacturer that also has a good customer service. If you’re very lucky, that company let’s you customize the product using several options. That company is British Tactical.

img_20180816_205628_170.jpg

The company reached out to me trough Spotter Up to test out some of their new products. Looking over their website and reading the reviews, I was intrigued. A British company that makes everything in the UK, has several types of pouches I’ve been looking for and hadn’t found before, options and attachments to their pouches,… great!

C360_2018-11-16-10-56-40-987

They also started working together with FLIMMUUR Tactical for the new range HORIZON Laminate. definitely worth checking out.

After some time-delay because of bigger and more important orders than a tiny reviewer, I received a big box of gear. Over the next several weeks, I will review these items.

On this post I will bundle all the different reviews:

  • 10X3 Chest Rig (Website / Review)
  • Chest Rig Triple Mag Insert (Website / Review)
  • Low Profile Chest Rig SHoulder Pads (Website / Review)
  • “Mad Jack” Knife Sheath (Website / Review)
  • Tactical Beer Koozie (Website / Review)
  • Double Universal Mag Pouch (Website / Review)
  • Mag Pouch Radio Insert (Website / Review)
  • Smoke Gren Pouch (Website / Review)
  • A5 Nyrex Stealth Admin Pouch (Website / Review)

~ FMB

20180816_20064320180816_200608.jpg

Helmet setup – Ops-Core

IMG_20190129_195209_519

Having done an overview of my 1st and 2nd line, it is time to show how I protect that ugly head of mine.

The standard helmet of the Belgian Armed Forces is an old design, similar to the PASGT, that is uncomfortable, outdated and doesn’t give the opportunity to wear ICW a headset.

For that reason, I used the MICH 2000 for several years. This was self bought, which caused some issues.

Luckily our higher-ups deemed it necessary that all TACP should be issued the Ops-Core FAST helmets. These were already issued to the SFG and Pathfinders. Rumours are that all combat units will get these issued, but “when?” is the big question.

IMG_20181228_233535_139

Let’s go over how I have set up my lid.

I’m using the solid stretch cover by First Spear, which is excellent! It camouflages and protects the helmet, while having enough loop velcro to attach counterweight, patches,… etc. This cover has seen a lot of use during the last 8 months, but is still looking like new.

20190222_155948

20190222_160016

On the front, I installed the NVG lanyard attachment by Down Range Gear (sourced at OPTACTICAL.COM) which already saved my PVS-14 from a nasty fall.

20190222_160058.jpg20190222_160010.jpg20190222_160058

PELTOR COMTAC III’s dual-comm allow me to talk to the Fly boys and my Teammates. They also protect my already diminished hearing. Loving the gel cups on these. They are attached with the normal ARC adapters by Peltor. Maybe I should upgrade to the Unity Tactical ones, but for now, they do their job.

20190222_160134.jpg

On the back, I have the FLIMMUUR copy of the TNVC MOHAWK. Reason for the copy, is that they don’t ship outside CONUS. It’s a great piece of kit that really helps to balance the Ops-Core when I’m using NVG’s. I’m currently also testing the new AGILITE counterweight, which is performing great already!

20190222_16020620190222_160154

Inside the counterweight pouch, there is one of the Spiritus System inserts with some AA batteries for my MS2000, PETZL and PVS-14.

On top of the pouch I have the old and trusty MS2000 that  I spray painted when I was bored.

I used to have a Princeton Tec MPLS attached to the side rail, but that one was lost coming back from deployment. Great piece of kit that I use all the time.

I hope you guys liked seeing this quick overview. If you have any questions or recommendations, let me know.

~ FMB20190222_160236